Install, then copy
The app executable and romfs.img travel separately. Both must be ready.
NX2APPLE · IPHONE & IPAD
Build the iPhone target on your Mac, choose an installation route, then finish the game-data transfer. This guide takes an exported NX2Apple IPA through signing, first launch and renewal, with the memory and save checks that matter for larger games.
NX2Apple 1.0.2 · Stable engine 65501fbb · iOS/iPadOS 26+ · 4 November 2026.
NX2Apple runs these games without an emulator JIT session. You still need a valid signature, the game’s matching data and enough memory. A signing tool handles the app identity and certificate; NX2Apple’s builder handles the game and engine.
Use Install on device with a paired iPhone or iPad and your development team. The launcher signs and installs during the build, then copies data.
Choose Classic 2.2 or later for the memory capability described by NX2Apple. AltServer on your computer handles installation and refresh.
Set up SideStore and its local VPN first. For large games, also check the App ID’s increased-memory capability.
Using the MacNativeGames TOTK project instead? Its per-game IPA, app paths and build commands are separate. Follow the TOTK iPhone and iPad guide. This page is for LNPANDY/NX2Apple on GitHub.
In Builds, choose the iPhone / iPad target and complete its build. In the Install card, switch from Install on device to Export as IPA. The export does not need a selected device or signing team.
Switching between these choices changes the data route and app identity. Back up before changing the app type.
Export the shared application and locate NX2Apple.ipa in the shell folder. Transfer it to a place the iPhone’s Files picker can read, such as your own iCloud Drive. This IPA does not include romfs.img.
This embeds that game’s data and uses org.nxnative.<title ID> as its app identity. Its archive makes the IPA much larger. If your signer fails on the large file, return to Shared app and send the data separately.
Retain the known-good IPA, original game inputs and launcher Cache files. The shared app uses cached game frameworks when rebuilding its library. Exporting again after changing the selected games can change which games its executable contains.
For the surrounding GUI build workflow, return to NX2Apple’s IPA export walkthrough. The older 1.0.1 device selector shown there belongs to direct Xcode installation; the IPA export choices were added in 1.0.2.
Use AltStore Classic, rather than the PAL marketplace. NX2Apple’s 1.0.2 memory instructions name Classic 2.2 or later as a route that retains the increased-memory entitlement.
Download AltServer from the official macOS installation guide, move it to Applications and open it. Connect the unlocked device, accept the device/computer trust prompts, and enable Finder’s Show this iPhone when on Wi-Fi option. Use the corresponding iPad option on an iPad.
From the AltServer menu-bar icon, choose Install AltStore → your device. Sign in with your own Apple account in AltServer. Keep the Mac and device connected until its completion notification appears.
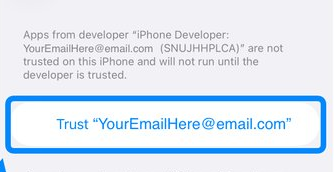
On the device, open Settings → General → VPN & Device Management. Choose your own developer account and confirm trust. On recent iOS versions, the confirmation may say Allow & Restart. Then enable Settings → Privacy & Security → Developer Mode and complete the restart and confirmation.

NX2Apple.ipa in Files and let signing and installation finish. Keep AltServer running and reachable.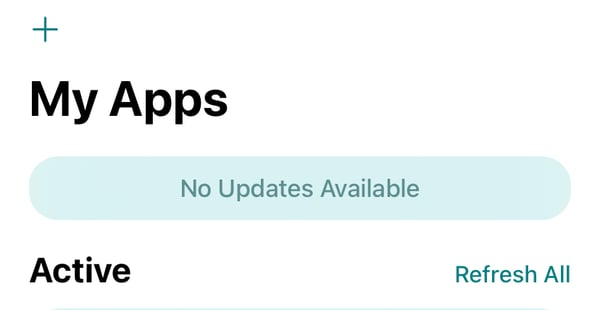
Could not find AltServer? Keep AltServer open on the same Wi-Fi network, or reconnect by USB. School, work and guest networks can block discovery between devices. Use the official connection troubleshooting if USB works but Wi-Fi does not.
SideStore’s current official setup uses iloader for the initial computer installation and LocalDevVPN on the device. Follow that route rather than importing an old WireGuard configuration from another tutorial.
Install LocalDevVPN from the source linked in SideStore’s prerequisites. Set it up and connect it. Use Wi-Fi; the documented setup requires more than a mobile-data connection.
Connect the unlocked device to the Mac by USB and trust the computer. Open iloader, sign in with your own Apple account, select the device and choose Install SideStore (Stable). Follow the official installation steps for your iOS version’s trust and Developer Mode prompts.
Connect LocalDevVPN, open SideStore and sign in with the same account used in iloader. In My Apps, tap SideStore’s expiry counter to refresh it. Finish that initial refresh before sideloading other apps.
With LocalDevVPN connected, open My Apps and use its add control to select your exported IPA. Wait for the install to finish. Keep the same signing account for later refreshes and updates.
Before starting a large game: NX2Apple’s pinned instructions identify SideStore 0.7.0 with a free Apple account as needing an extra App ID capability step. Use the memory check below if the app is killed while loading. On later SideStore versions, compare the actual game log before assuming that the capability is active.
If pairing breaks after an iOS update or reset, use SideStore’s pairing recovery link. Keep the installed game and its saves while repairing the connection.
The app executable and romfs.img travel separately. Both must be ready.
The library must have its game code, data and compatible profile.
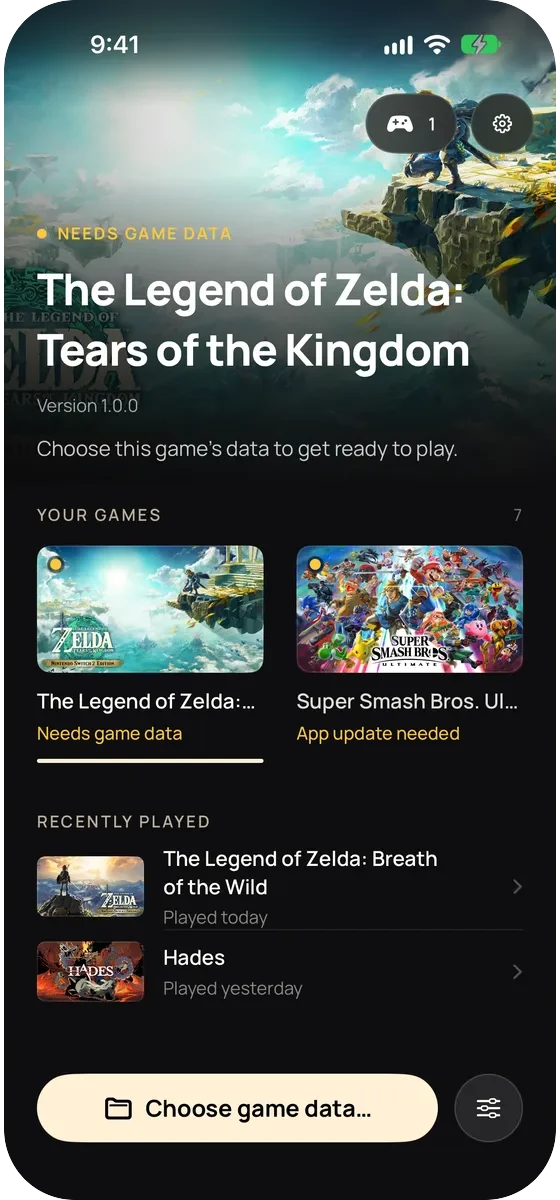
Older iPhone builds used romfs.idx shard archives. Release 1.0.2 reads the newer romfs.img route; resend the game’s data through the launcher when moving from that old layout.
Check memory before reducing resolution repeatedly. iOS can terminate a process that exceeds its per-app budget. NX2Apple requests com.apple.developer.kernel.increased-memory-limit; it must survive re-signing and be enabled on the App ID used by the provisioning profile.
log.txt before another launch. The previous run is log.prev.txt.memory up to frame. Add resident to headroom to the system memory limit. That sum is the enforced budget, rather than the device’s advertised total RAM.memory up to frame 600: resident 3342 MB, ... headroom to the system memory limit 33 MBIn this example, 3342 + 33 = 3375 MB. The game has almost no remaining headroom. The pinned project report found that lowering render scale to 0.5 did not solve that guest-memory limit.
For AltStore Classic 2.2+ or the direct Xcode route, also inspect the log if a large game still exits. A completed installation alone is not the memory check. The pinned entitlement guide explains both the signature and App ID requirements.
Refresh renews signing; rebuild updates the game app. A free-account sideload normally expires after seven days. Refresh before its counter reaches zero. A signature refresh does not add a new game framework or update the game’s data.
save/ to a separate dated backup. If the game uses a chosen iCloud save folder, back up that folder too.Deleting the device app removes its local container. Do not delete it just to renew the signature. Shared and One game exports have different identities, so switching between them needs an explicit save transfer. A fresh empty container does not mean the old save was converted.
For a free account, the three-active-app limit includes the sideloader itself. The ten App IDs registered per week are a separate limit; deleting an app does not immediately clear an App ID registration. See AltStore App IDs and SideStore’s limits.
Keep your Mac’s launcher Cache files folder and signing identity when updating the shared app. Return to NX2Apple’s rebuild and save workflow for changes to the launcher or engine.
Finish downloading or copying the IPA locally before picking it in Files. Check free device storage. If you exported One game, all inside, retry with Shared app and transfer the game data after installation.
The signature worked. Follow Step 3’s archive transfer or choose the correct external data folder. Re-signing the same empty shell does not add its game archive.
Rebuild/export the shared app with that game’s framework included, then sign and install over the same app identity. Keep its data and saves; selecting a data folder cannot add missing executable code.
Follow the memory-budget check. Keep the game and device versions with the log. Fix a missing entitlement before trying higher FPS or repeatedly changing render scale.
Check the signing expiry counter and refresh. Repair AltServer or SideStore’s connection if necessary. Keep the installed app and save backup while renewing it.
Choose a game profile and build →Compare the export choices →Explore the nxnative engine →
Sources: NX2Apple 1.0.2 workflow · memory entitlement · AltStore My Apps · SideStore installation. English screenshots are cropped from the linked project documentation. Guide updated 4 November 2026.