Open the launcher
Apple silicon Mac with macOS 13 or later. This minimum lets the launcher open; it does not mean every game can be built on that OS.
NXNATIVE GUI · MAC & IOS
NX2Apple gives nxnative a graphical builder and game library. Choose your own game files, build for this Mac or install the shared game app on an iPhone or iPad. Start by matching the game profile and build tools.
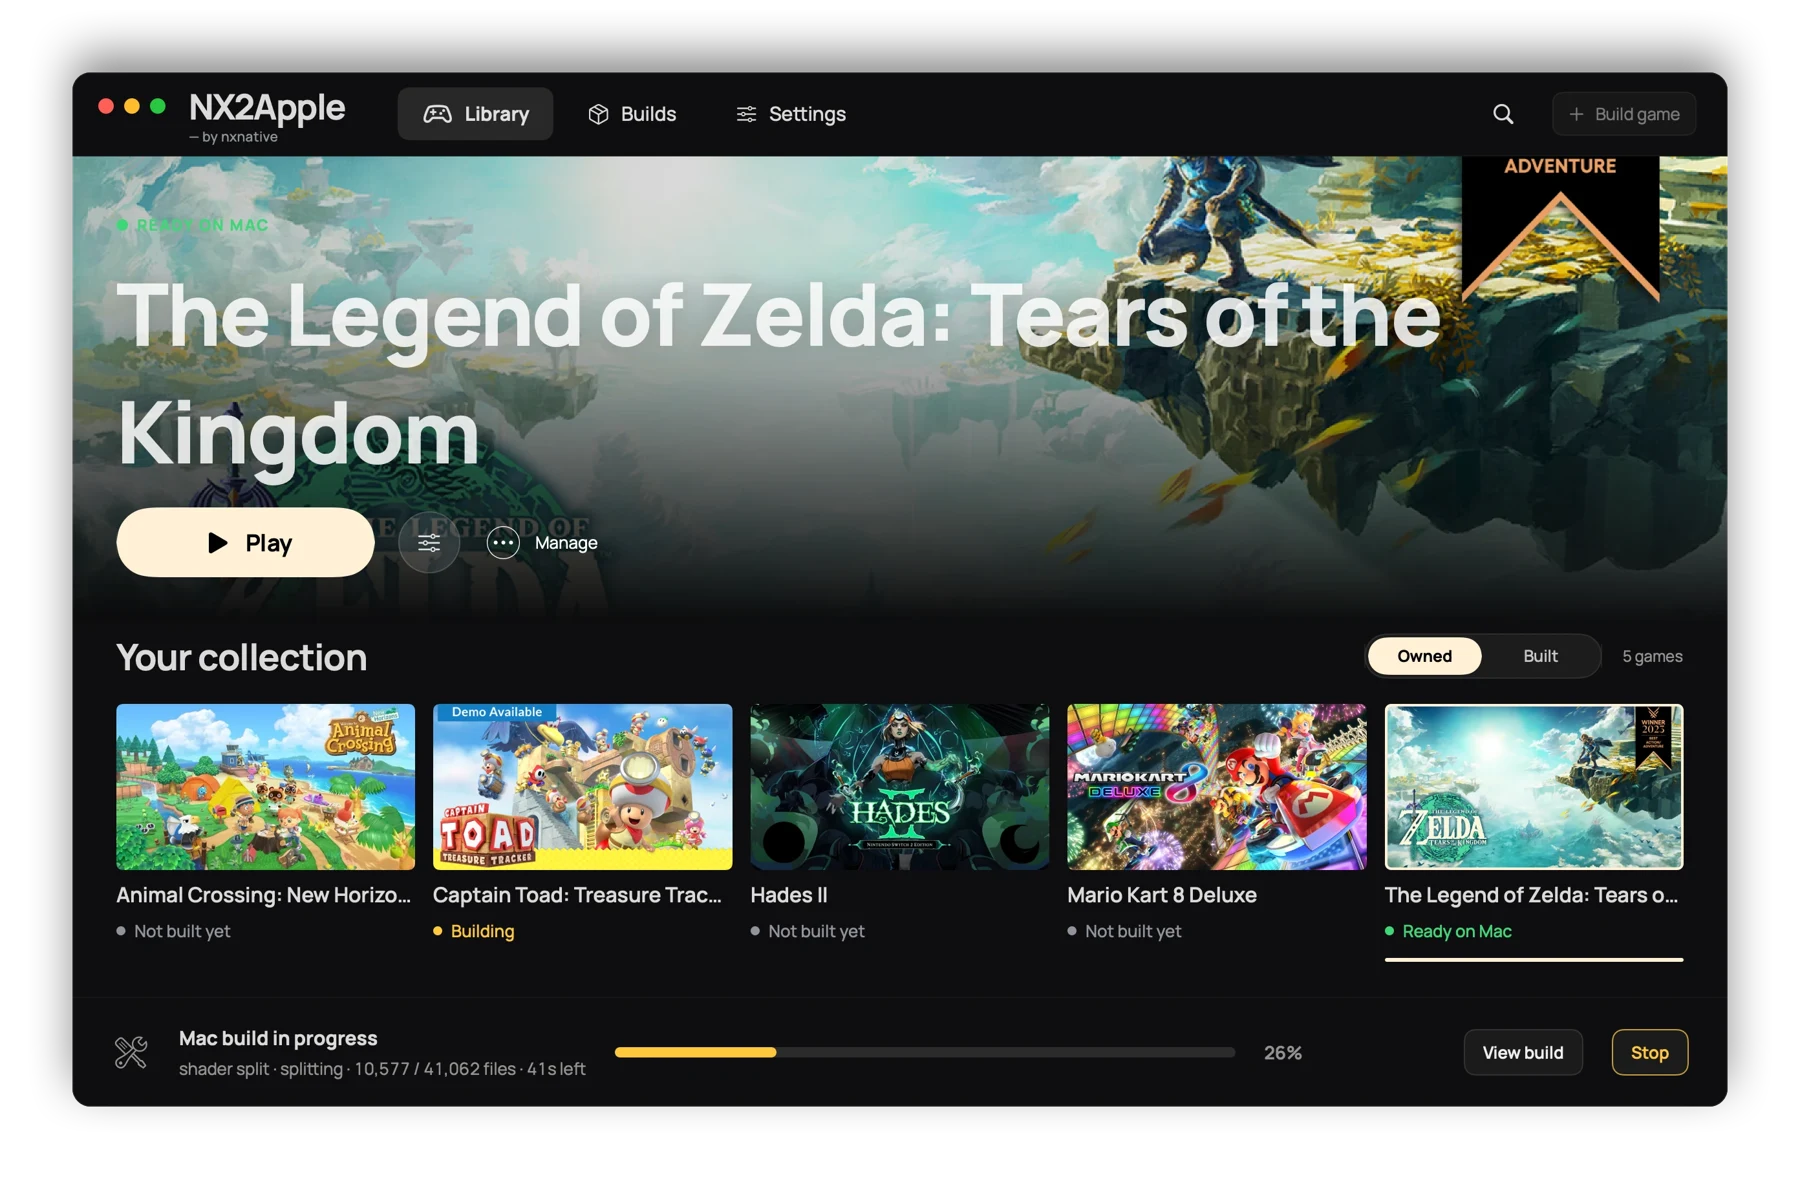
Guide: NX2Apple 1.0.1 · Stable engine cd859c38 · 2 November 2026.
The project is LNPANDY/NX2Apple on GitHub. Open its release assets and choose NX2Apple-macOS-arm64.zip. Extract the ZIP and move NX2Apple.app to Applications. The engine-only ZIP and “Source code” downloads are not the ready-to-open launcher.
Apple silicon Mac with macOS 13 or later. This minimum lets the launcher open; it does not mean every game can be built on that OS.
For this release, prepare macOS 26.6 or later, full Xcode 27.2 and the Metal toolchain. Follow the selected game’s requirements. Command Line Tools alone do not replace full Xcode.
The project requires iOS/iPadOS 26 or later. You also need a paired device and signing through Xcode. A listed game or device option is not a guarantee of sufficient memory or stable gameplay.
NX2Apple uses nxnative’s game profiles: each profile identifies a supported game version. It does not turn an arbitrary Switch game into a working port. The 1.0.1 release specifically says the GUI cannot yet build Switch 2 games or directly use an extracted-files folder, even though the underlying engine has work in those areas.
Already following another guide? The MacNativeGames TOTK builder uses a different project and file workflow. Keep its commands, versions and save instructions separate from NX2Apple.
If macOS blocks the first launch, verify that the file came from the project’s release. Use the application-specific Open Anyway option in Privacy & Security when appropriate. Follow the guide to your exact macOS warning; do not disable Gatekeeper for the entire computer.
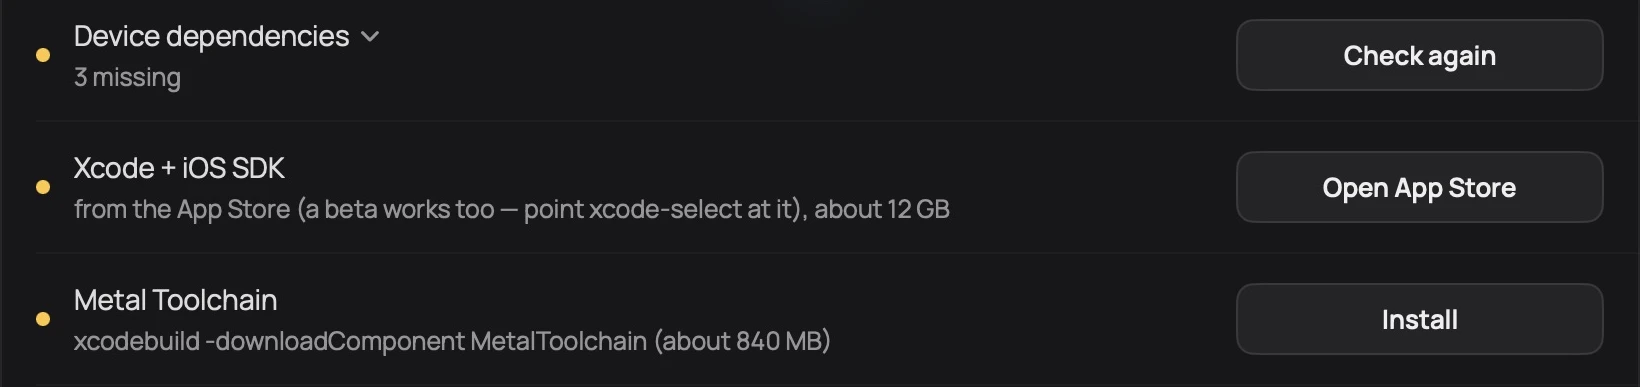
Use first-run setup, or Settings → Run setup again. Install full Xcode and let its initial component setup finish. In NX2Apple, expand Device dependencies. Use the offered action for a missing Metal Toolchain or .NET SDK 10, then choose Check again. Python and several build utilities are bundled.
Open Settings → Build tools. This guide uses engine 1.0.1, upstream cd859c38. Stable is the engine paired with the application release. Experimental follows newer upstream changes; it is a separate choice, not a required setup fix.
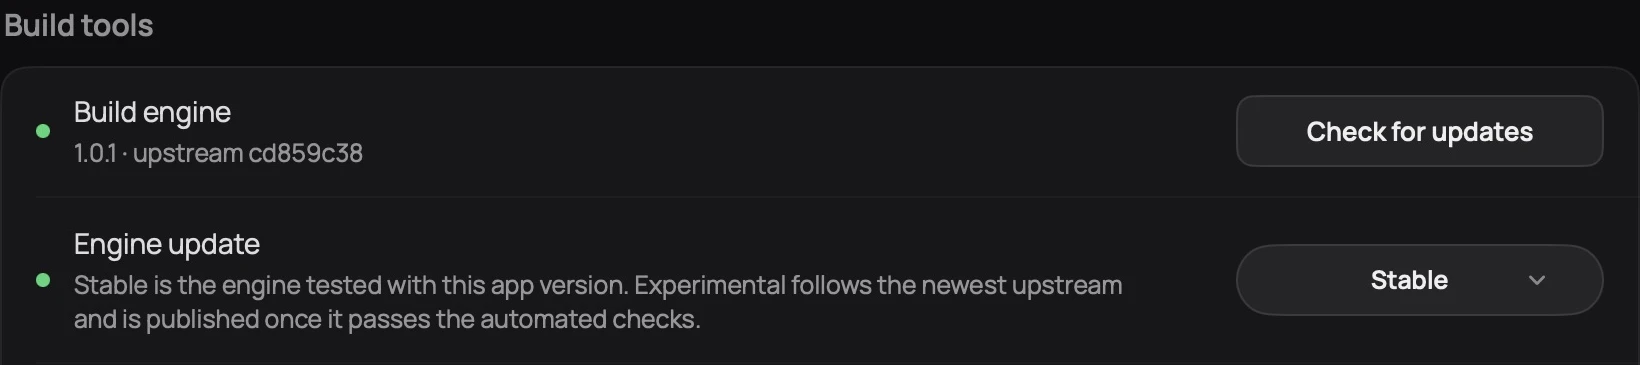
Older instructions say “Download repository.” The released 1.x application manages its engine through releases and Settings. You do not need to clone the upstream repository just to follow this GUI workflow.
Use game files you are entitled to use and keys from your own Switch. NX2Apple and this website do not supply game files or keys. Keep your original files unchanged while building.
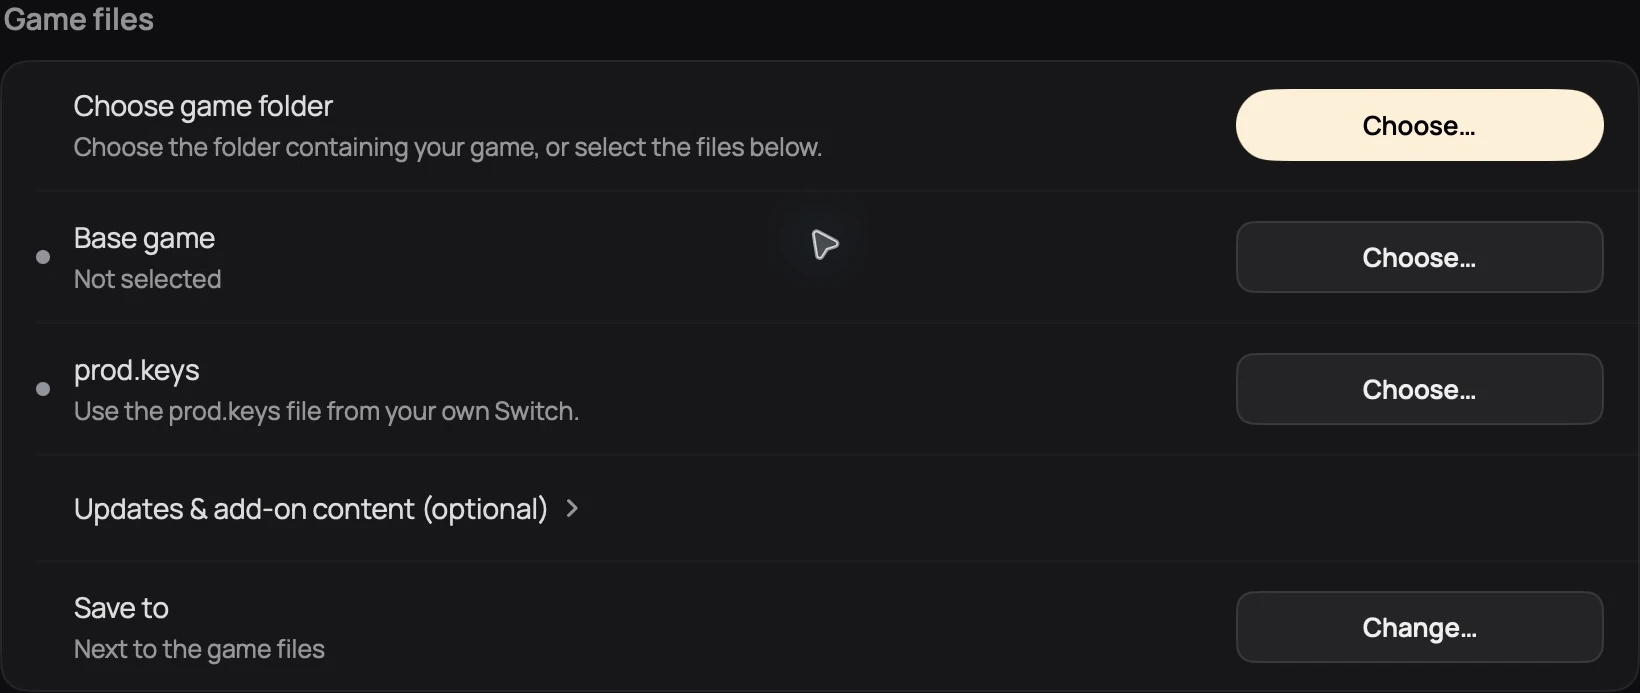
Use Choose game folder for a folder containing your packages, or select the base NSP/XCI through Base game → Choose. A folder containing packages is different from an extracted ExeFS/RomFS directory, which the 1.0.1 GUI does not yet build directly.
Select your prod.keys. Expand Updates & add-on content to add the game update or supported DLC. Match the game’s profile version; “optional” in the general interface does not mean an update is optional for a particular profile. Do not substitute the latest patch if the profile calls for another version.
Check Save to before starting. The build cache lives under the output location as <ID>_build. Reusing the same output location can reuse that work; a new folder starts over. Leave room for the input, extracted data, build cache and result, rather than only the compressed game package.
For profile selection, use the nxnative supported-game lookup, then verify its source date against your engine. A profile’s listed progress matters as much as its game name.

Confirm the base, update, keys and output directory first. If the action is disabled, resolve the setup message above it. Do not repeatedly change files while a build is in progress.
Wait for the build to finish and follow its output location. Finished games appear in Library. If a stage stops, expand Build log and use the first relevant error to choose a fix below. A completed compile is not a gameplay test.
Open the game’s launch options from Library, keep its defaults and press Play. Check basic input and save loading before increasing image quality or frame-rate targets. Available options depend on the game profile.
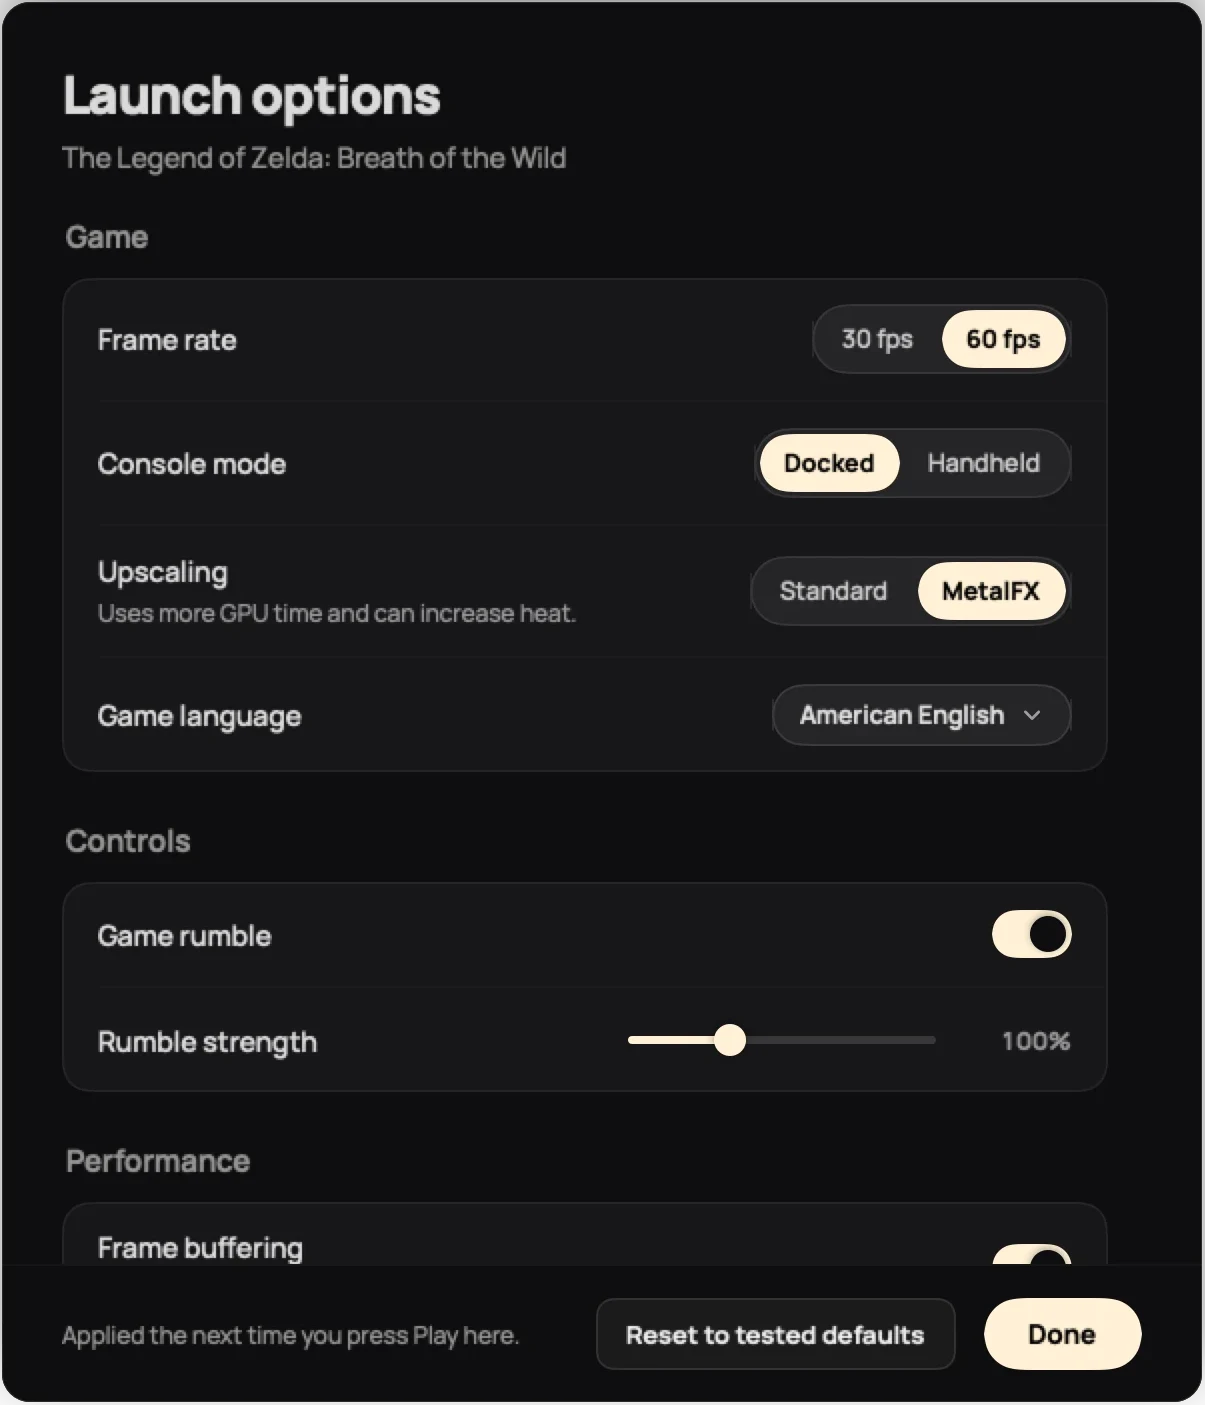
Use Mac controller pairing for connection problems. The Monster Hunter Rise guide covers its specific nxnative profile; its results should not be applied to other titles or engine revisions.
NX2Apple 1.x installs a shared game application. Several built games can live in one iOS library. This is different from the separate per-game IPA workflow in the MacNativeGames TOTK iOS guide.
Install Xcode with the iOS SDK. Connect the unlocked iPhone or iPad to the Mac, accept its trust prompt and pair it in Xcode’s Devices and Simulators window. Complete Developer Mode setup on the device when required. Sign in to your Apple account in Xcode and make your development team available.
Return to Builds, select iPhone / iPad, then choose your device under Install on. Use Refresh if you paired it after opening the launcher. If no device appears, resolve pairing and Xcode setup before building.

Start the build after resolving dependencies. The launcher prepares the shared app, signs it through Xcode, installs it on the selected device and copies the game data. Keep the device connected and unlocked until both installation and data transfer finish. Installing the app alone does not supply romfs.img.
On the device, select the game. A missing-data message means you must finish copying or choose its data location. An app-update message means that the library entry needs a newer built application; repeatedly selecting the same data folder will not update its executable.
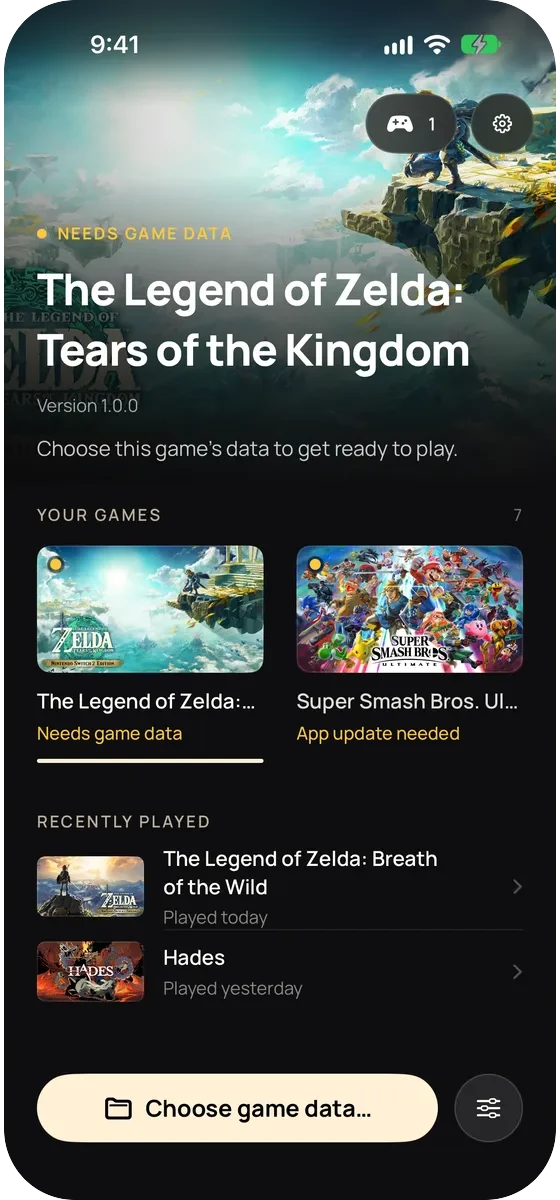
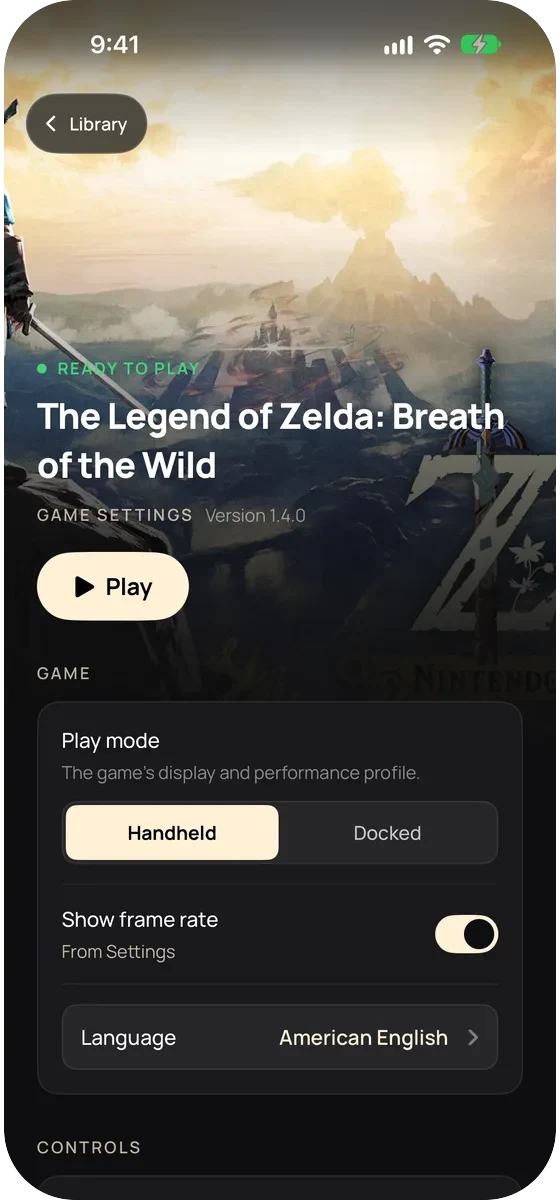
Needs game data
Finish copying the archive or choose its folder.
App update needed
Install a rebuilt application that includes this game.
Ready to play
Open the game, then check controls and save loading.
English interface examples published by NX2Apple, not a device test performed by this website.
This native execution route does not require enabling an emulator’s JIT session. It still requires a valid app signature, the correct game data and enough memory. Large games also depend on the increased-memory entitlement being present in both the signature and provisioning profile. Lowering render resolution does not restore a missing entitlement.
The launcher’s Xcode installation route handles signing during the build. If you choose a separate sideloader, check its entitlement handling in the project’s increased-memory instructions; an IPA that installs successfully can still be killed when memory use rises.
Copy saves outside the app.
Same team, bundle ID and shell cache.
Load the expected save before cleanup.
Quit the game. Copy its saves to a separate dated folder outside the app and build output. For a launcher-managed Mac game, look beside the game app for its save data; a standalone nxnative build can instead use ~/Library/Application Support/nxnative/<titleID>/. Identify the actual populated folder rather than assuming every route shares one path.
For the shared iOS shell, keep the same signing team and stored bundle identifier. Installing over that same app preserves its Documents; changing the identifier starts a separate data container. Do not delete the device app to refresh its signature. Preserve the launcher’s Cache files directory too: it retains the frameworks for the other installed games.
Record the current engine and application versions, then use the appropriate Check for updates action in Settings. Keep Stable selected unless you specifically need an Experimental change. Rebuild the affected game and confirm its save loads before removing your backup or older output.
The iOS data-folder picker now matches a game by the identity inside romfs.img. It searches up to two levels below the folder you select, and folder names can vary. Keep the archive intact and choose a parent folder close to your game folders. A game buried more deeply may not be discovered. Renaming an unrelated archive does not make it match.
For a device backup, copy the shared application’s Documents through Finder file sharing to a location outside that app. The launcher stores copied game data under Documents/games/<titleID>. Preserve the complete structure and any external data or save folder you selected. Keep the backup until the expected game progress opens after the update.
Start with the visible symptom. Changing signing tools cannot fix a failed Mac compile, and changing graphics settings cannot fix a missing game archive.
Check whether the Mac’s shared-shell framework cache was removed or a different shell root was used. The launcher needs those retained frameworks to include the existing games in the rebuilt app. Restore your retained cache or rebuild those games, keeping the original app identity and independent save backup.

The six setup-control crops were captured from the official 1.0.1 Mac application. Library, launch-options and iPhone illustrations are interface examples published in the project. They explain the workflow and do not represent a completed game build or a device benchmark by this website.
Next: nxnative command-line guide and profiles · compare the native builders · TOTK’s separate MacNativeGames iOS workflow.