
A large game stopped opening
Update from 0.3.3 to 0.3.4, then open the affected game again. This release repairs that regression; start with the app update before reimporting or rebuilding the game.
Get the 0.3.4 release ↗S2ARM / SHARED NATIVE GAME LIBRARY
S2Arm builds your own Switch games for Apple devices and keeps them in one game-library app. Use its Mac or Windows launcher to import files, prepare a build and install it; start here to choose the right platform and protect your saves.
FORMAL RELEASE · 13 NOVEMBER 2026
Update from 0.3.3 to 0.3.4, then open the affected game again. This release repairs that regression; start with the app update before reimporting or rebuilding the game.
Get the 0.3.4 release ↗If you moved from 0.2.4–0.2.9 to 0.3.0/0.3.1, update to 0.3.4 and follow the dated-backup recovery below. Updating fixes the cause; selecting the right backup recovers the lost progress.
Recover the pre-update save ↓Already on 0.3.4 with working games? Keep your library and continue with the normal import or backup steps. Earlier 0.3.2/0.3.3 fixes are included; you do not need to install those versions in sequence.
| Route | What you get | Prepare |
|---|---|---|
| Apple silicon Mac → Mac | A native Mac game library. | The Mac launcher, your game files and its environment checks. Published player target: macOS 15+. |
| Mac → iPhone / iPad | The shared mobile app and each game’s resources. | Full Xcode, the iOS platform, your Apple account and a trusted device. Published player target: iOS/iPadOS 18+. |
| Windows → iPhone / iPad | A mobile build, with signing and installation through the bundled Impactor tool. | The Windows launcher and its dependencies. Windows is the build computer, not a native Windows game player. |
The player’s minimum OS is not an Xcode installation requirement. On Mac, use Settings to check Xcode and its SDK before an iPhone build. Android and HarmonyOS are listed as upcoming platforms in this release.
Several games live inside one application. Adding a game does not require a separate app identity for each title.
NX2Apple has its own engine and signing workflow. MacNativeGames’ game-specific scripts have separate outputs and save locations. Match instructions to the app you opened.
Open S2Arm v0.3.4 Releases ↗. On an Apple silicon Mac, choose S2Arm-mac-arm64.dmg; on Windows, choose S2Arm-windows-x64.zip. Release checksums are in SHA256SUMS.txt. The project also links its downloads from s2arm.com.
On Mac, open the disk image and copy the application to Applications before launching it. Keep the installed app separate from your game-data folder. For a macOS warning, identify the exact message in the first-open guide and confirm the original release source.
Follow the welcome page’s primary action to prepare the computer. In 0.3.4, open Settings in the top-right toolbar for missing components. Older screenshots call this Environment. For an iPhone build on Mac, install full Xcode, open it to finish setup, add your Apple account and make the iOS platform available. Continue when the launcher says This Mac is ready.
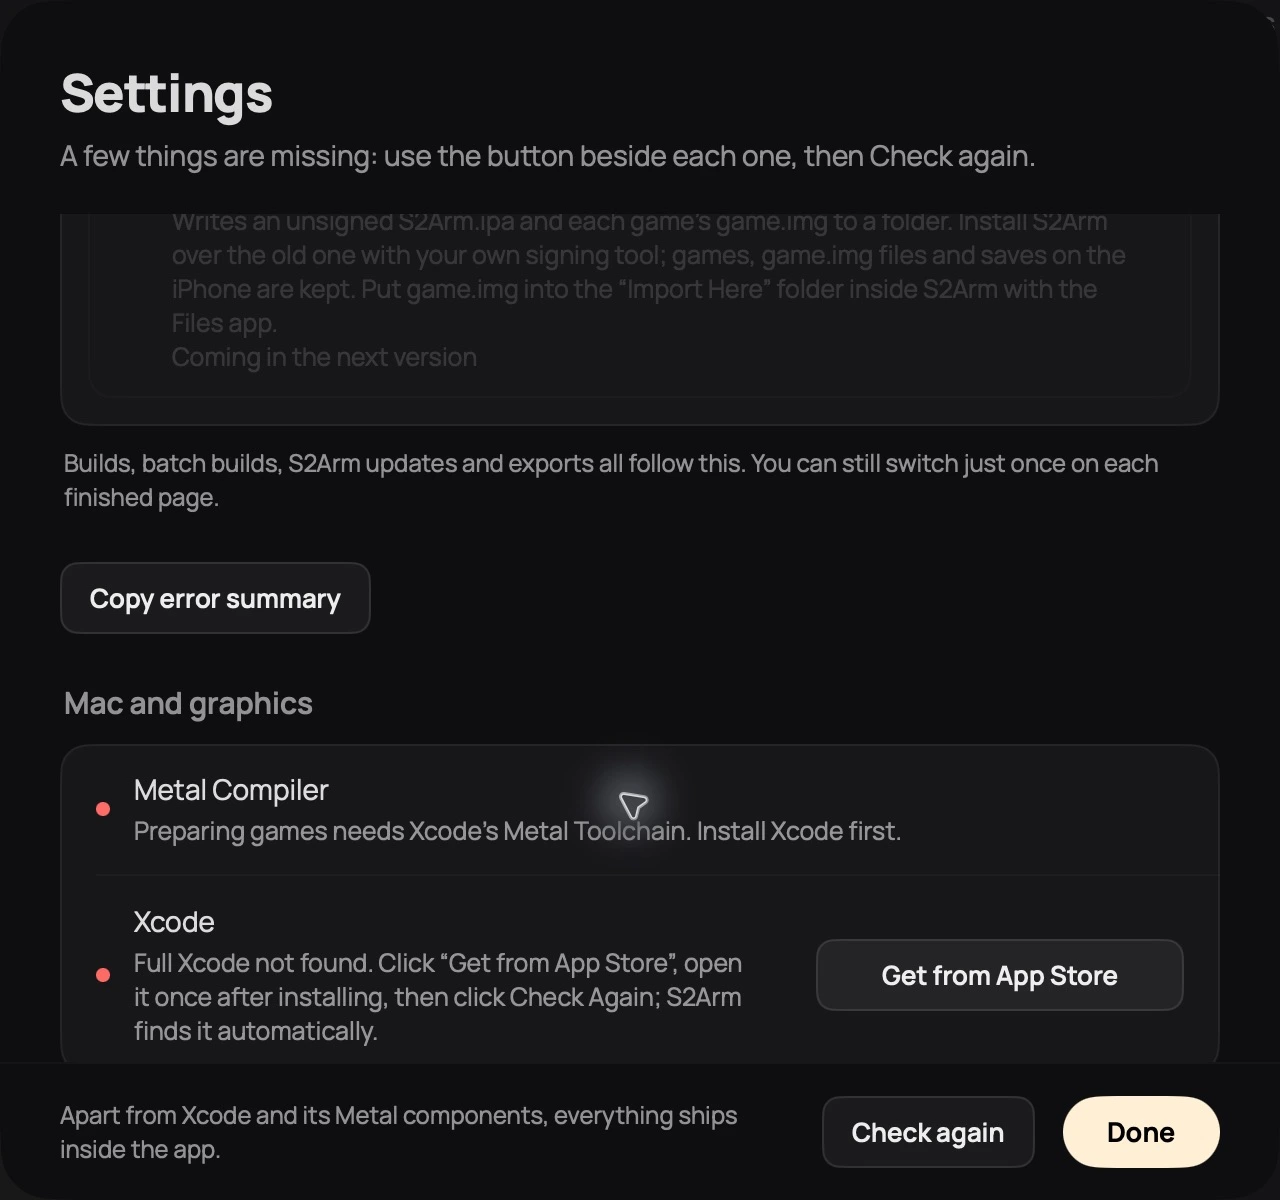
Install full Xcode first
Recheck after Xcode setup
Open Settings in the top-right toolbar. This Mac is missing full Xcode, so the Metal compiler also waits for it. Install Xcode, open it once, then return to Check again.
Image source ↗ Open full-size image ↗
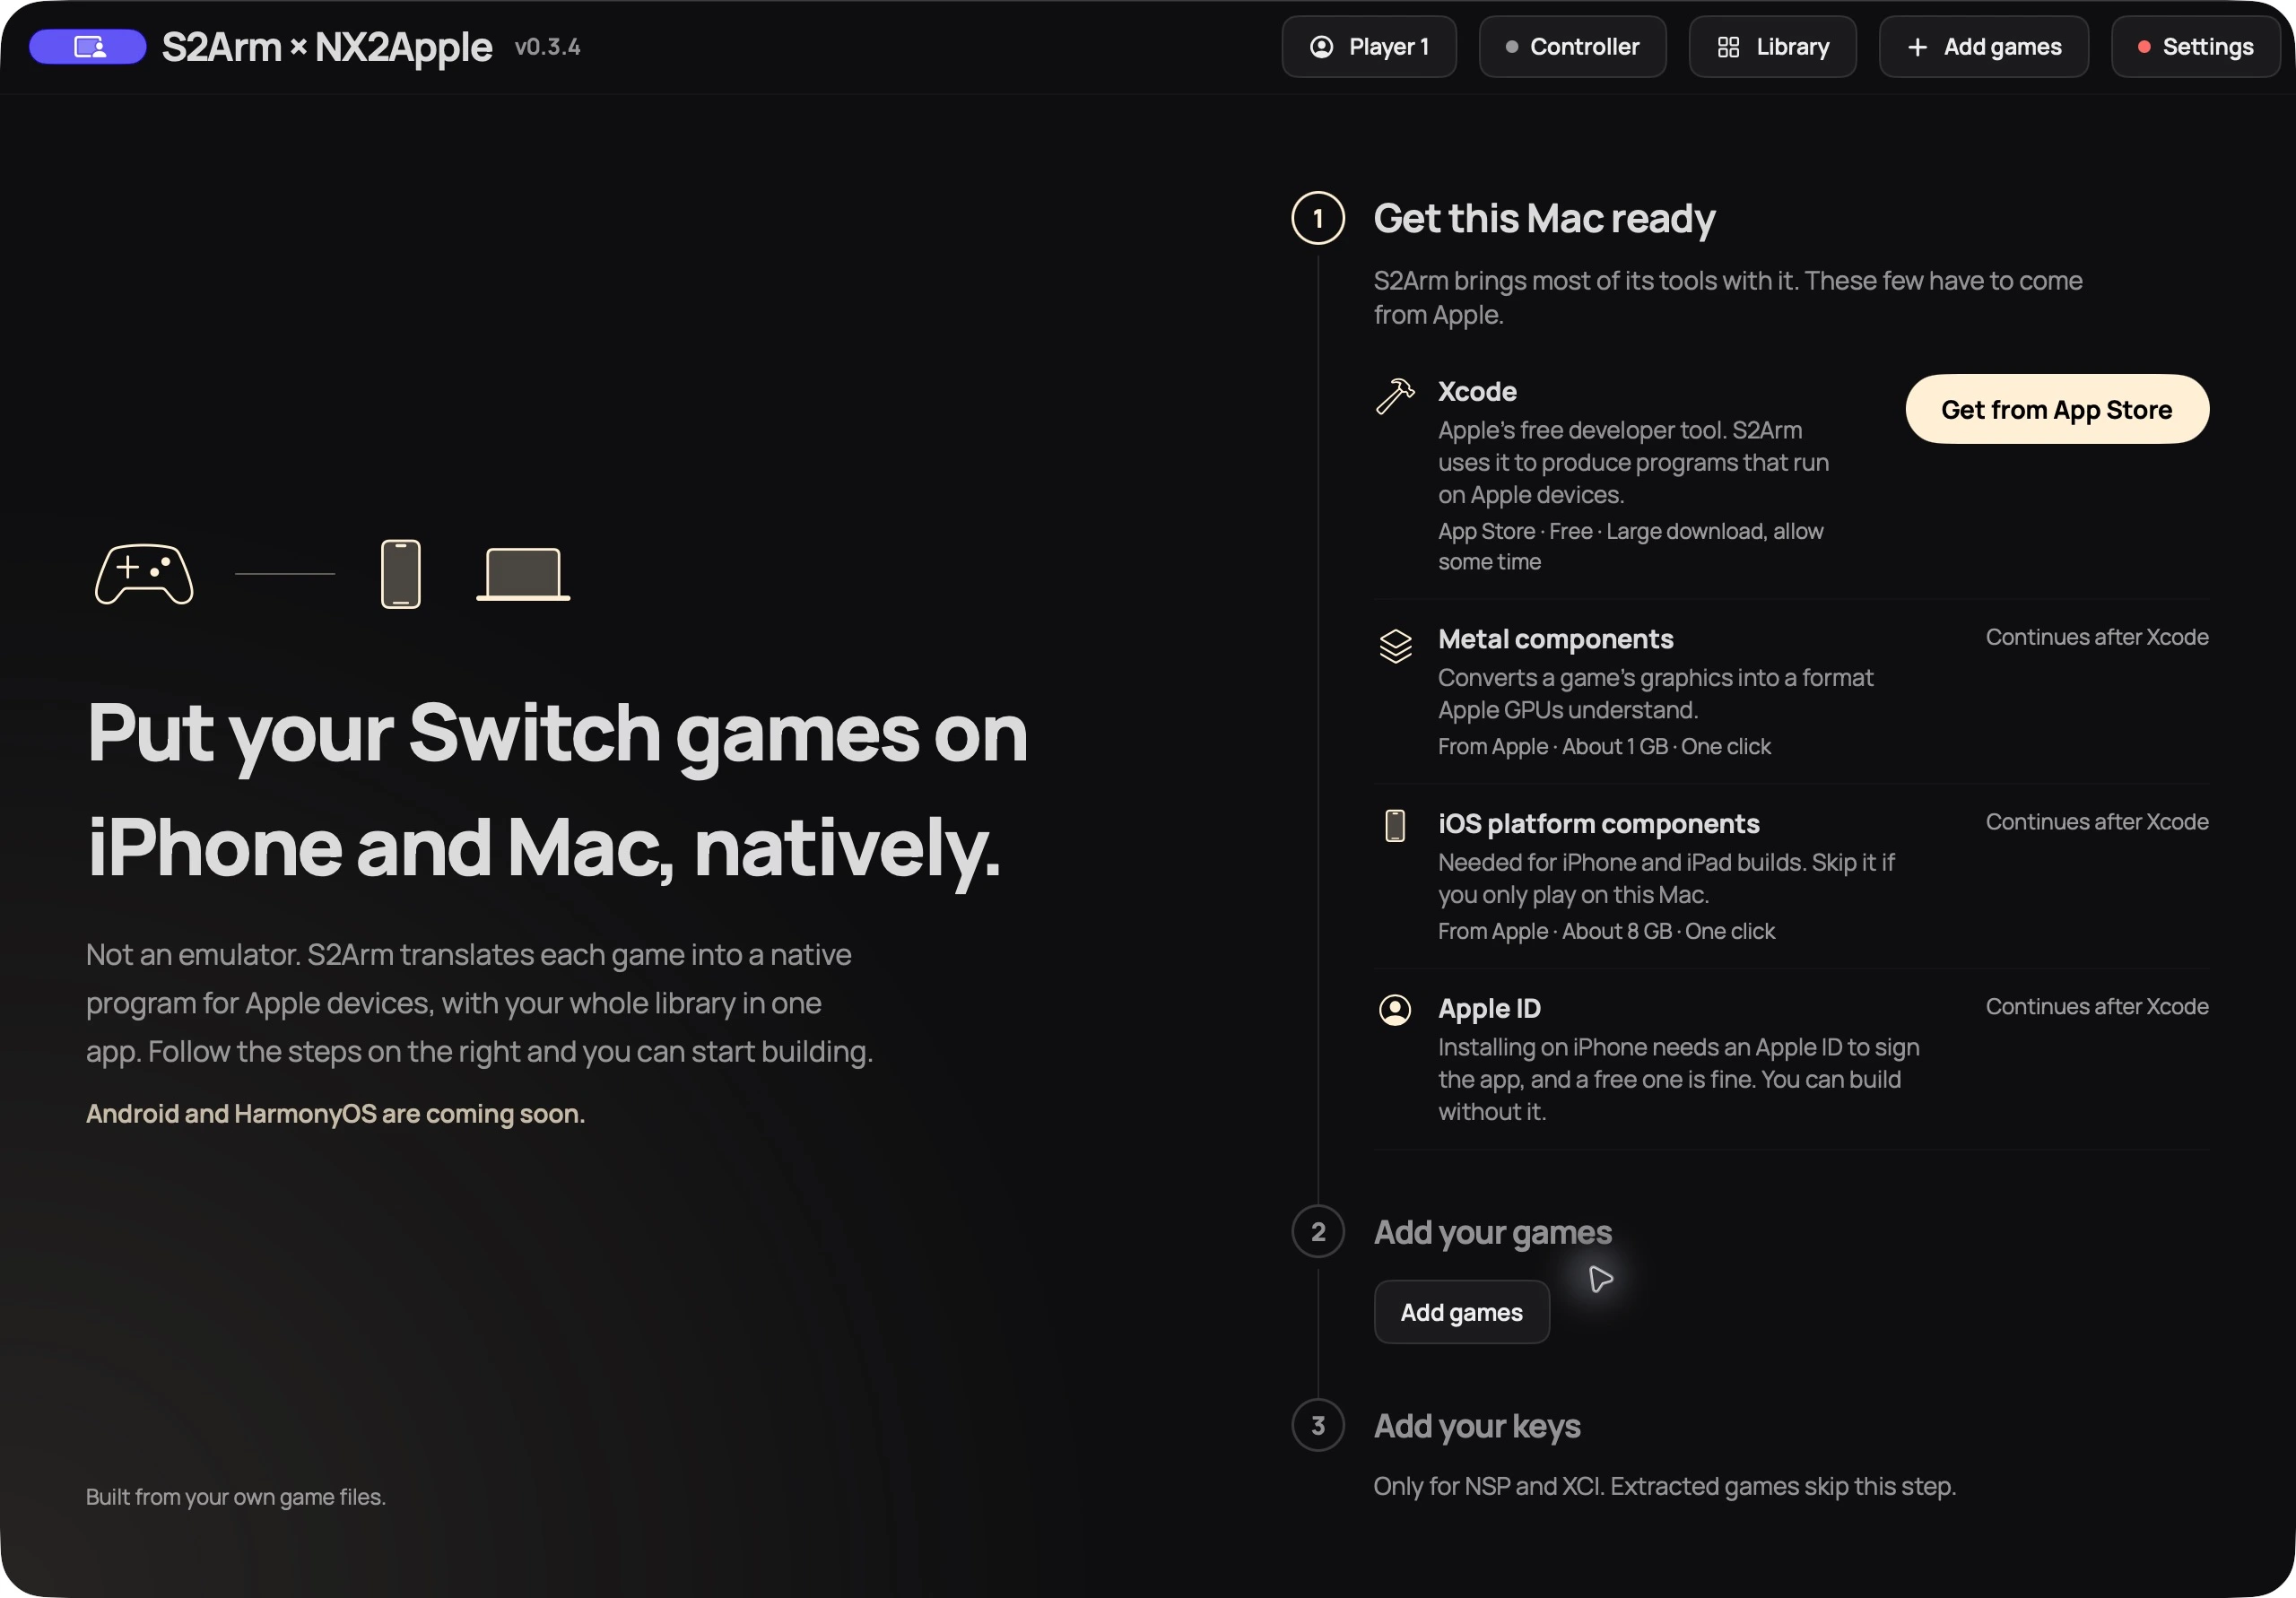
Choose your game files
Read whether this input needs keys
The current welcome page separates computer setup, Add your games and Add your keys. The keys note applies to NSP/XCI packages; extracted games skip that request. The top bar also shows the running 0.3.4 version.
Image source ↗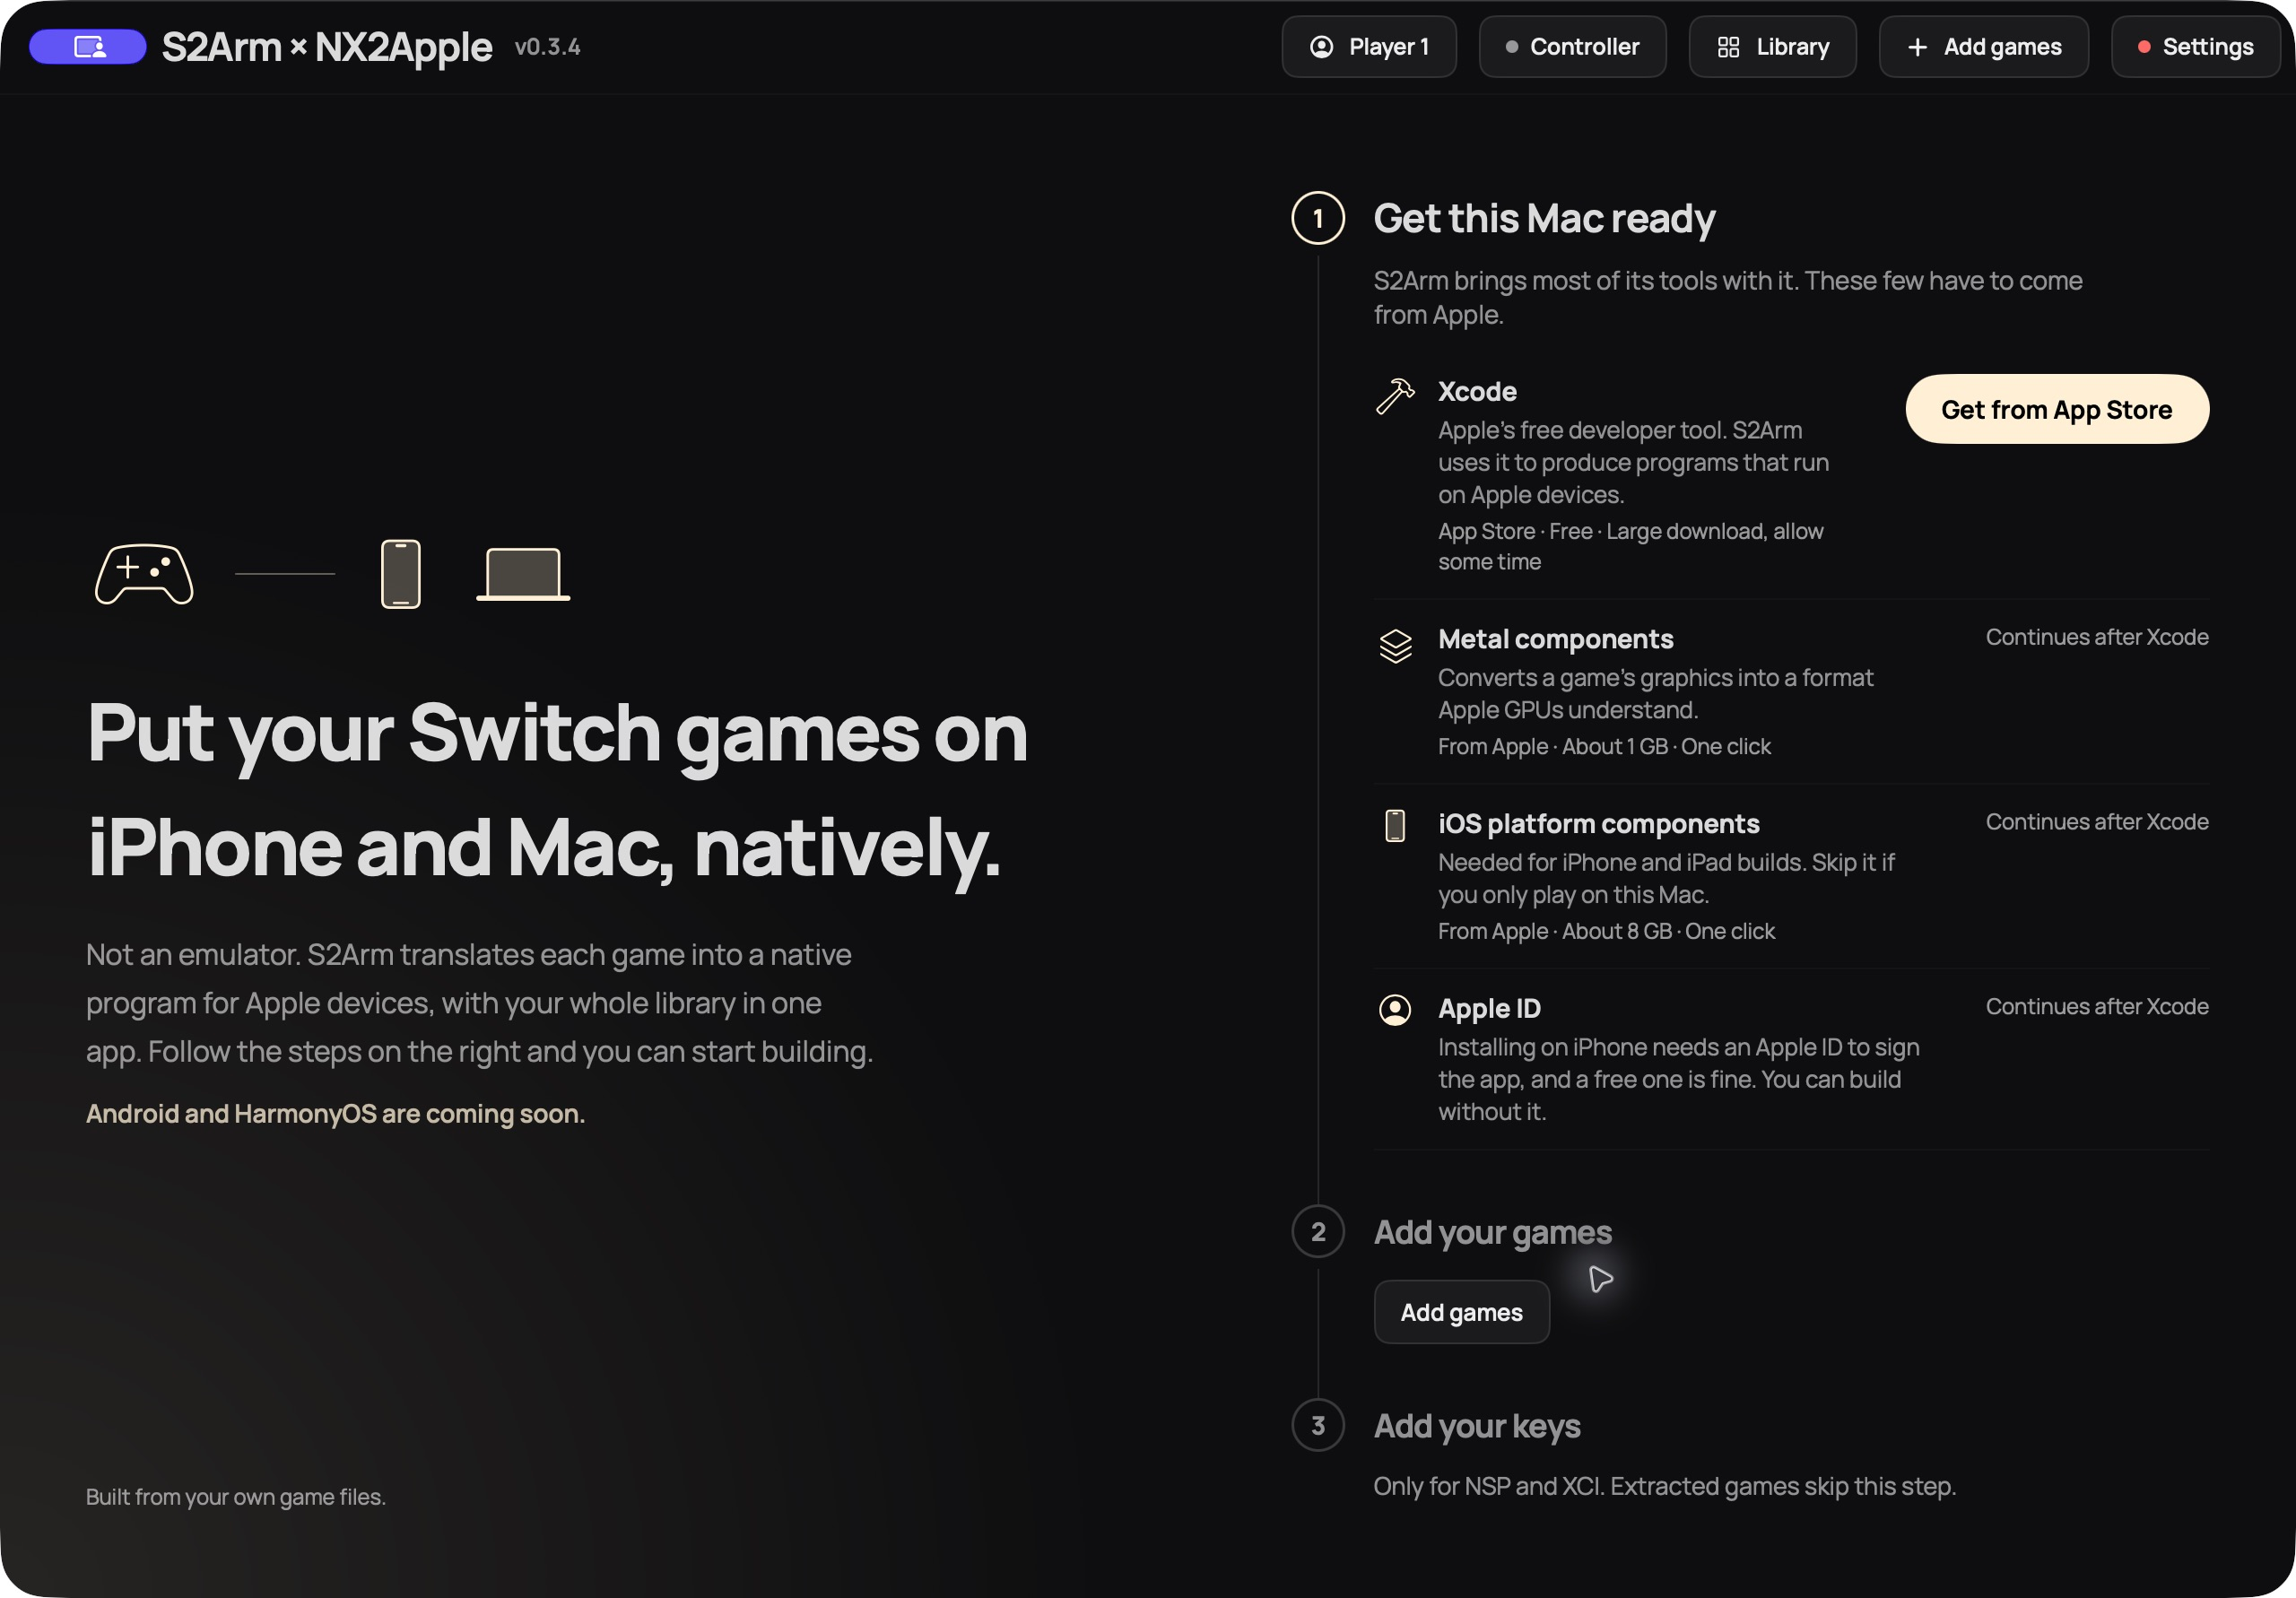 Open full-size image ↗
Put your legally obtained base game, chosen update and optional DLC in one folder. Keep the original files available. An update package alone does not supply the base game.
Choose the game files or their containing folder. The launcher also accepts extracted game folders. Review the selected game and version before building; similar filenames are not a reliable version check.
Add prod.keys from your own Switch when the launcher requests it for NSP/XCI extraction. Already extracted inputs can skip this request. If a package cannot be read, first check that the selected keys and base/update files belong to the game you imported.
S2Arm targets 64-bit AArch64 games. Its documented exclusions include 32-bit ARM games and games needing a 36-bit address space. Match an individual game’s import/build result rather than choosing solely by its title.
Select the device on which you will play. Check the game title, selected update, output and available disk space. Then use the build action. The welcome flow calls it Build now.
The launcher unpacks the game, prepares resources, analyzes graphics, compiles its shader library and builds/signs the application. Keep the computer plugged in and awake. Several games can queue and build in sequence.
Wait for the build/export result, then choose installation or reveal the files. If it stops, open Details and keep the first relevant error and active stage. Returning to Library while a job continues is different from cancelling it.
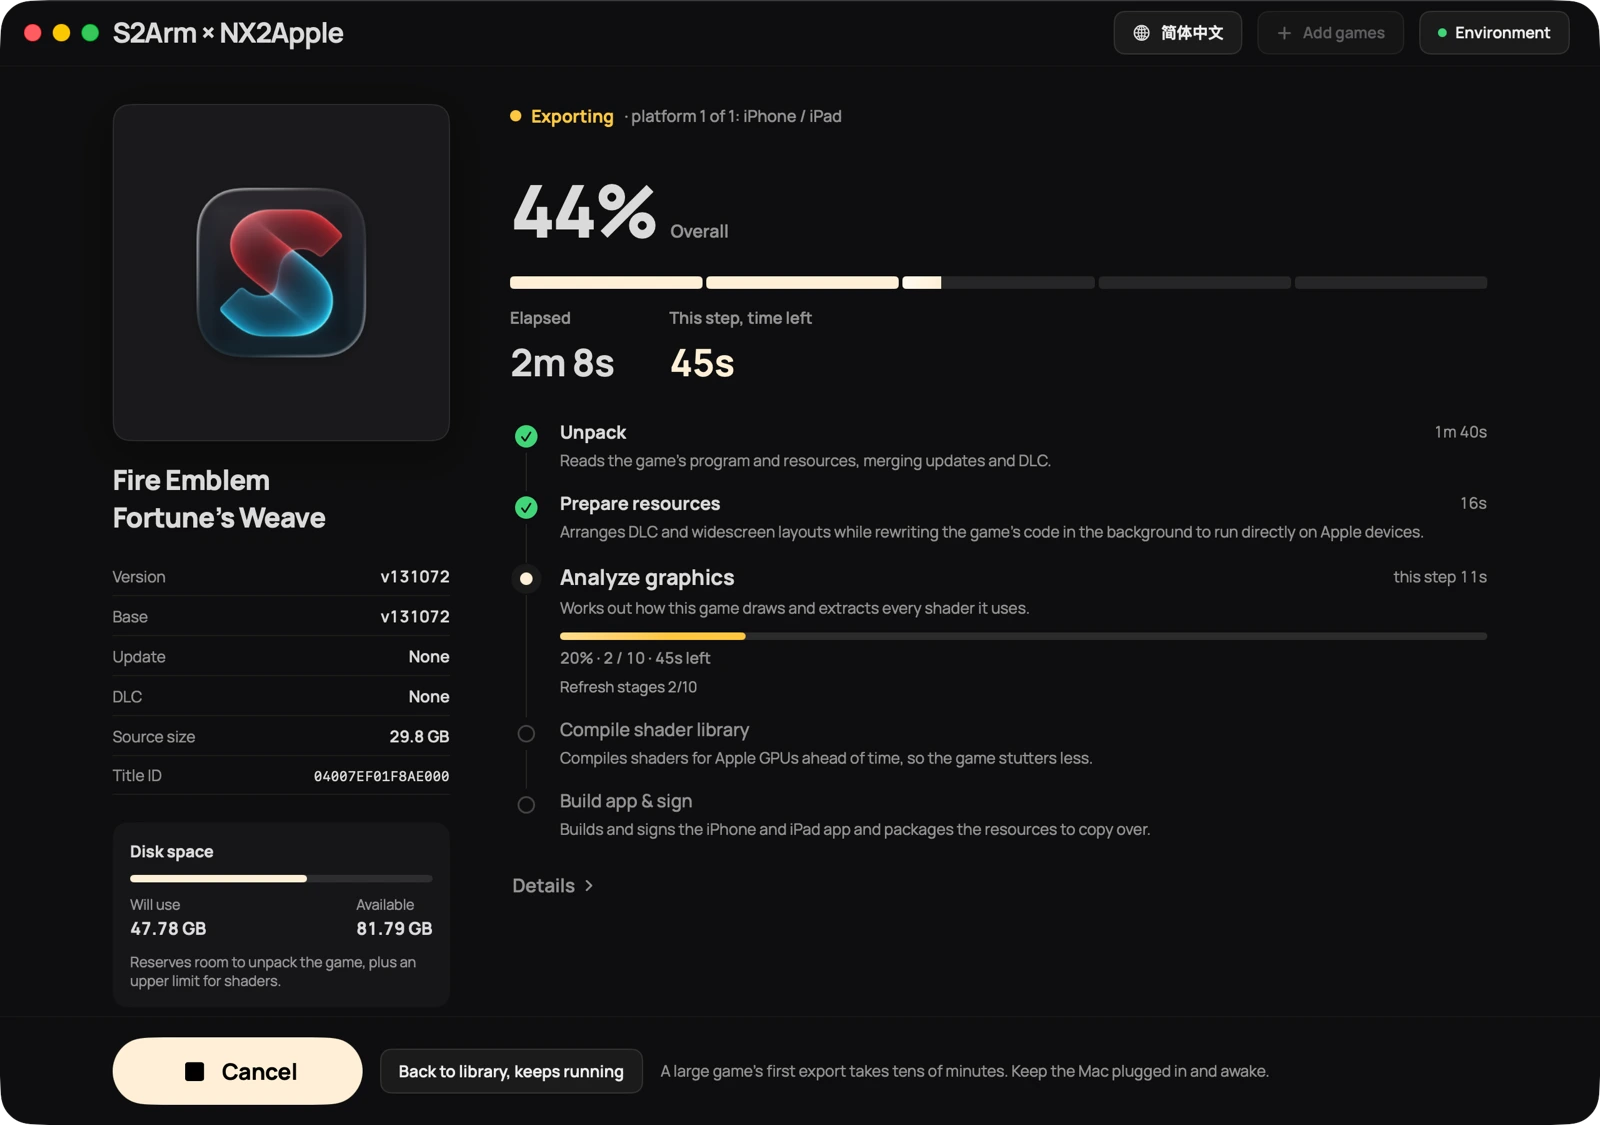
Follow the active stage
Check space before starting
Follow the highlighted stage, from unpacking to shader compilation. Check the estimate against available disk space for the game you selected; use Details if a stage stops.
Image source ↗ Open full-size image ↗
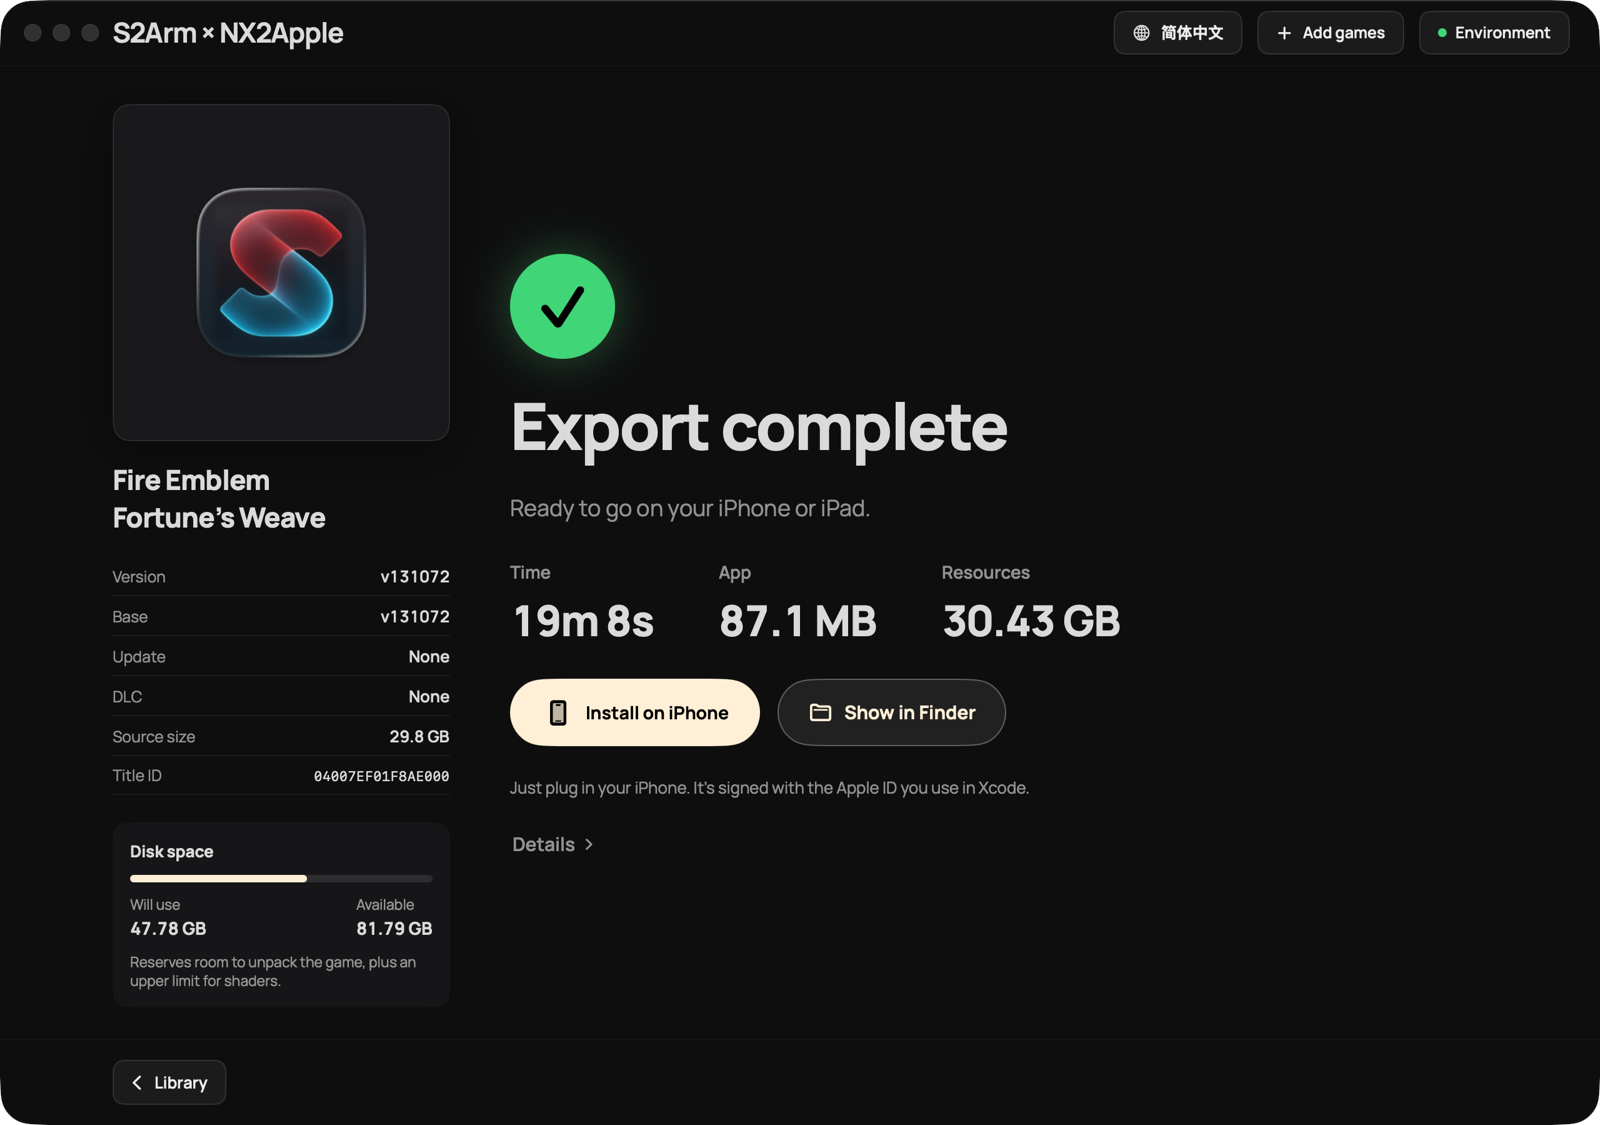
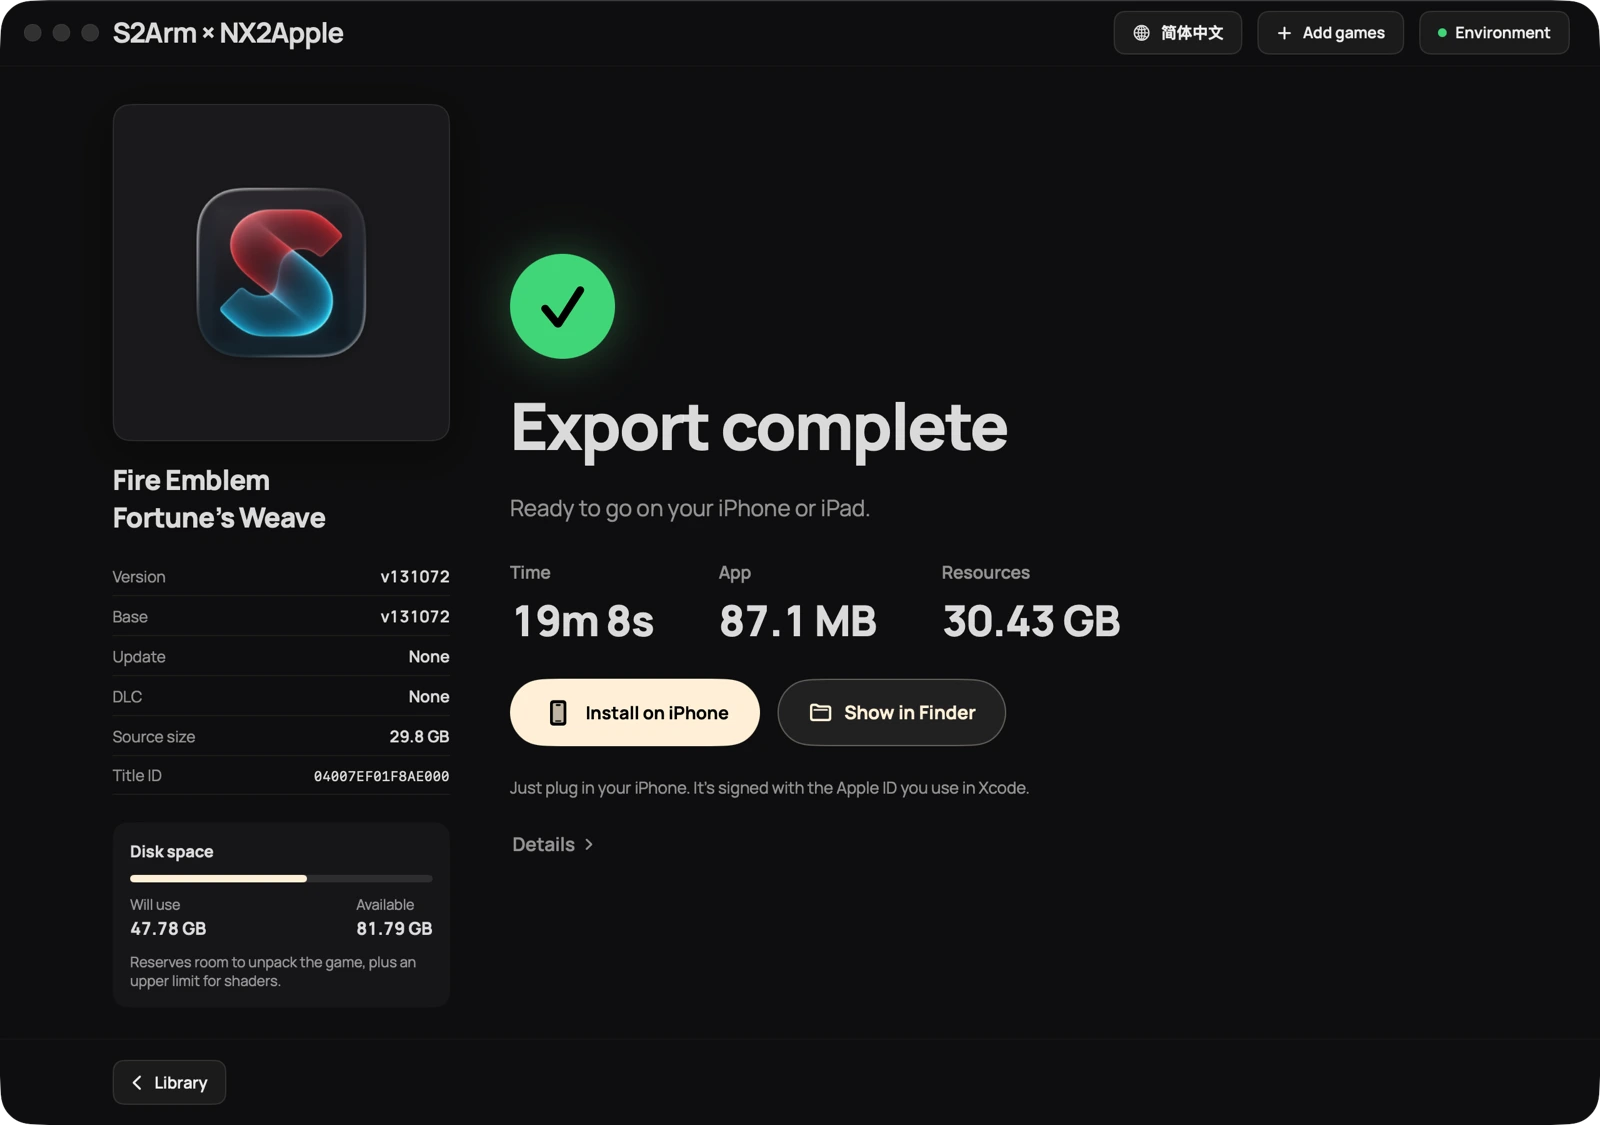
Wait for the completion result
Install or reveal the output
The mobile completion example separates the application from its much larger resources. Install on iPhone uses the Apple account configured in Xcode on the Mac route.
Image source ↗ · Full-size image ↗In Settings → How to put S2Arm on your iPhone, the current direct-install route signs and copies the game data over a cable. Under Signing identity, use the same Xcode account or developer-certificate route as your existing app.
Switching between those identities installs a separate app; its save container starts separately. Export a backup from the old app first and keep it installed until progress loads in the new one. The persistent Export and sign it yourself choice is disabled as “Coming in the next version” in 0.3.4; use the active route for this release.
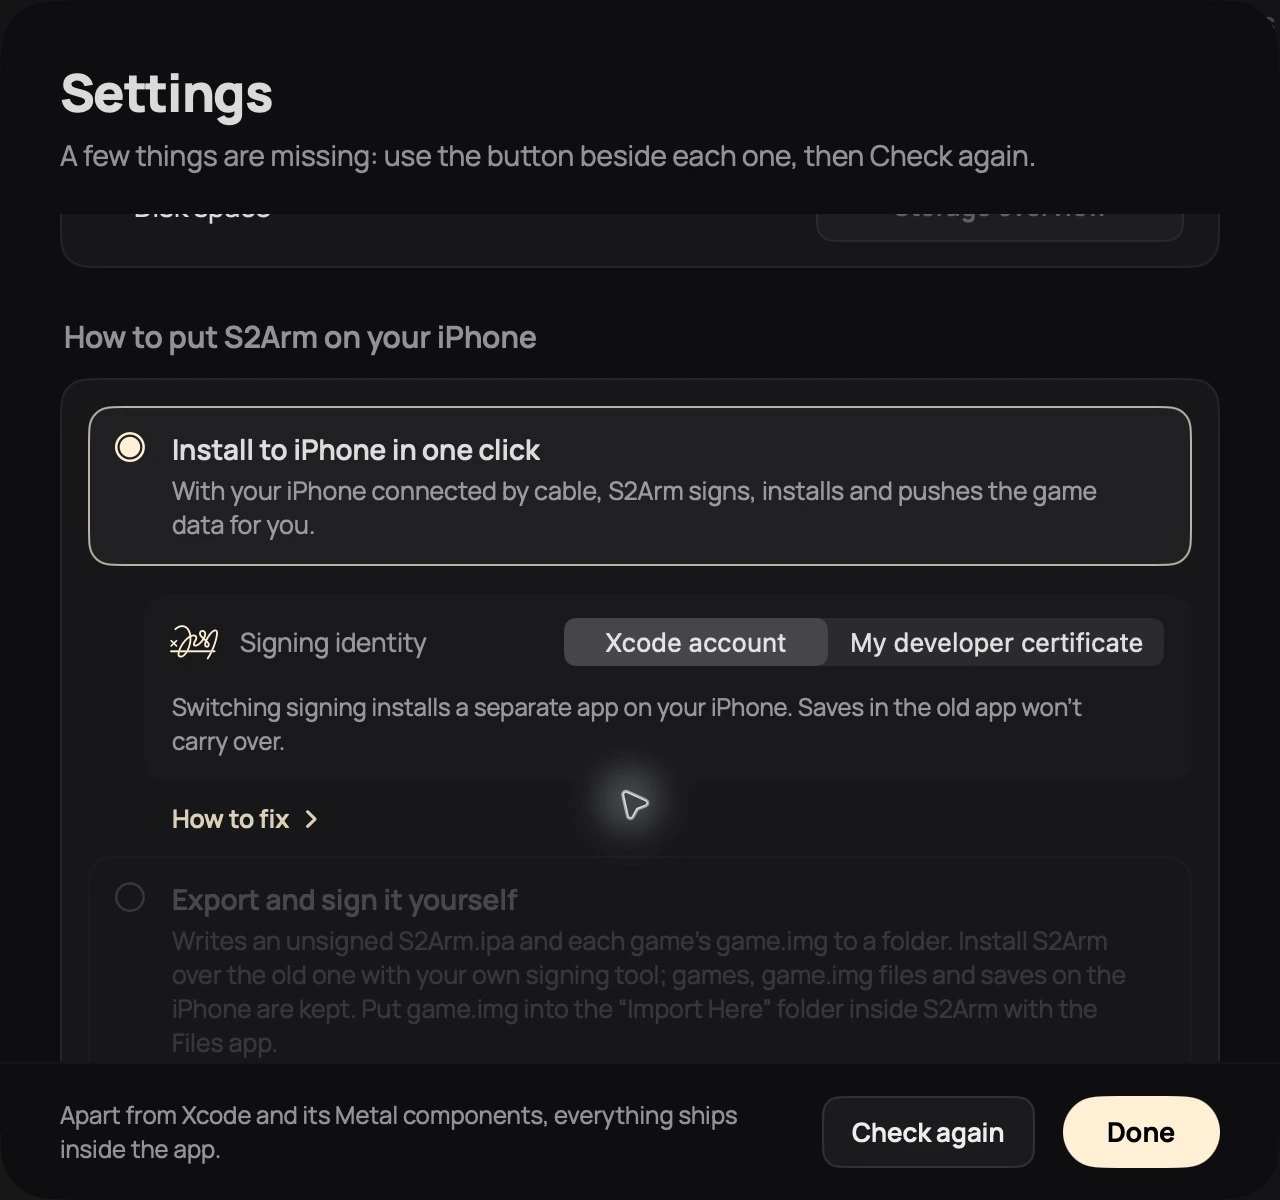
Use the active cable-install route
Xcode-account route selected
A separate certificate route
Xcode account is selected here. My developer certificate is a different signing route. Keep the previous app and a save backup before changing this choice.
Image source ↗ Open full-size image ↗
Installing only the application does not copy all game resources. The native route does not need an emulator JIT activation session; app signing, the game’s data and device memory still matter. For a different signing tool or app identity, back up first and follow the matching export flow available in that release. The NX2Apple guide covers its separate shared-IPA and standalone-IPA choices.
The title is in your collection. Choose a platform and build it.
The mobile export is ready. Install it and finish transferring resources.
Open the intended game on its device; check controls and load progress.
Use the selected game’s controls and options rather than copying TOTK’s shortcuts into every game. For connection problems, complete Mac controller pairing before changing a game’s mappings.
The Mac launcher has per-game save management. Use it with the game closed; save operations take the library lock so they do not compete with a running game or another library job.
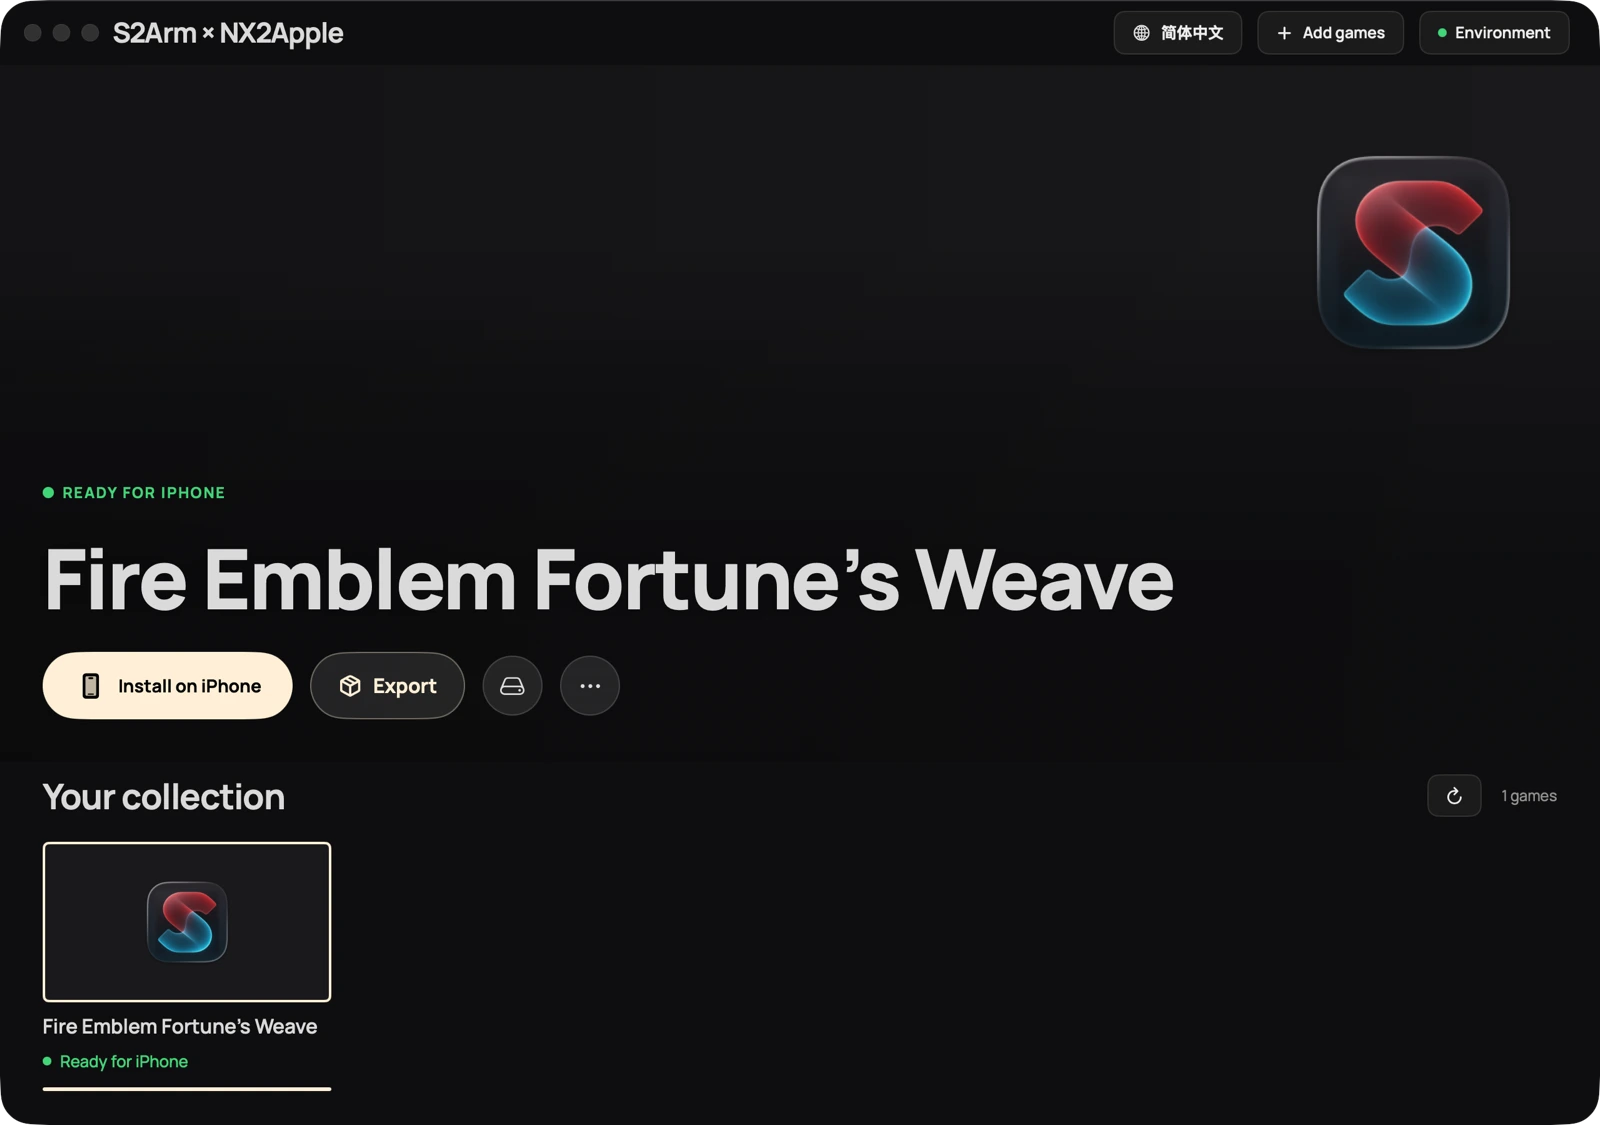
Open this game’s three-dot menu
The selected game’s three-dot menu leads to Saves. Keep that game closed while backing up or restoring.
Image source ↗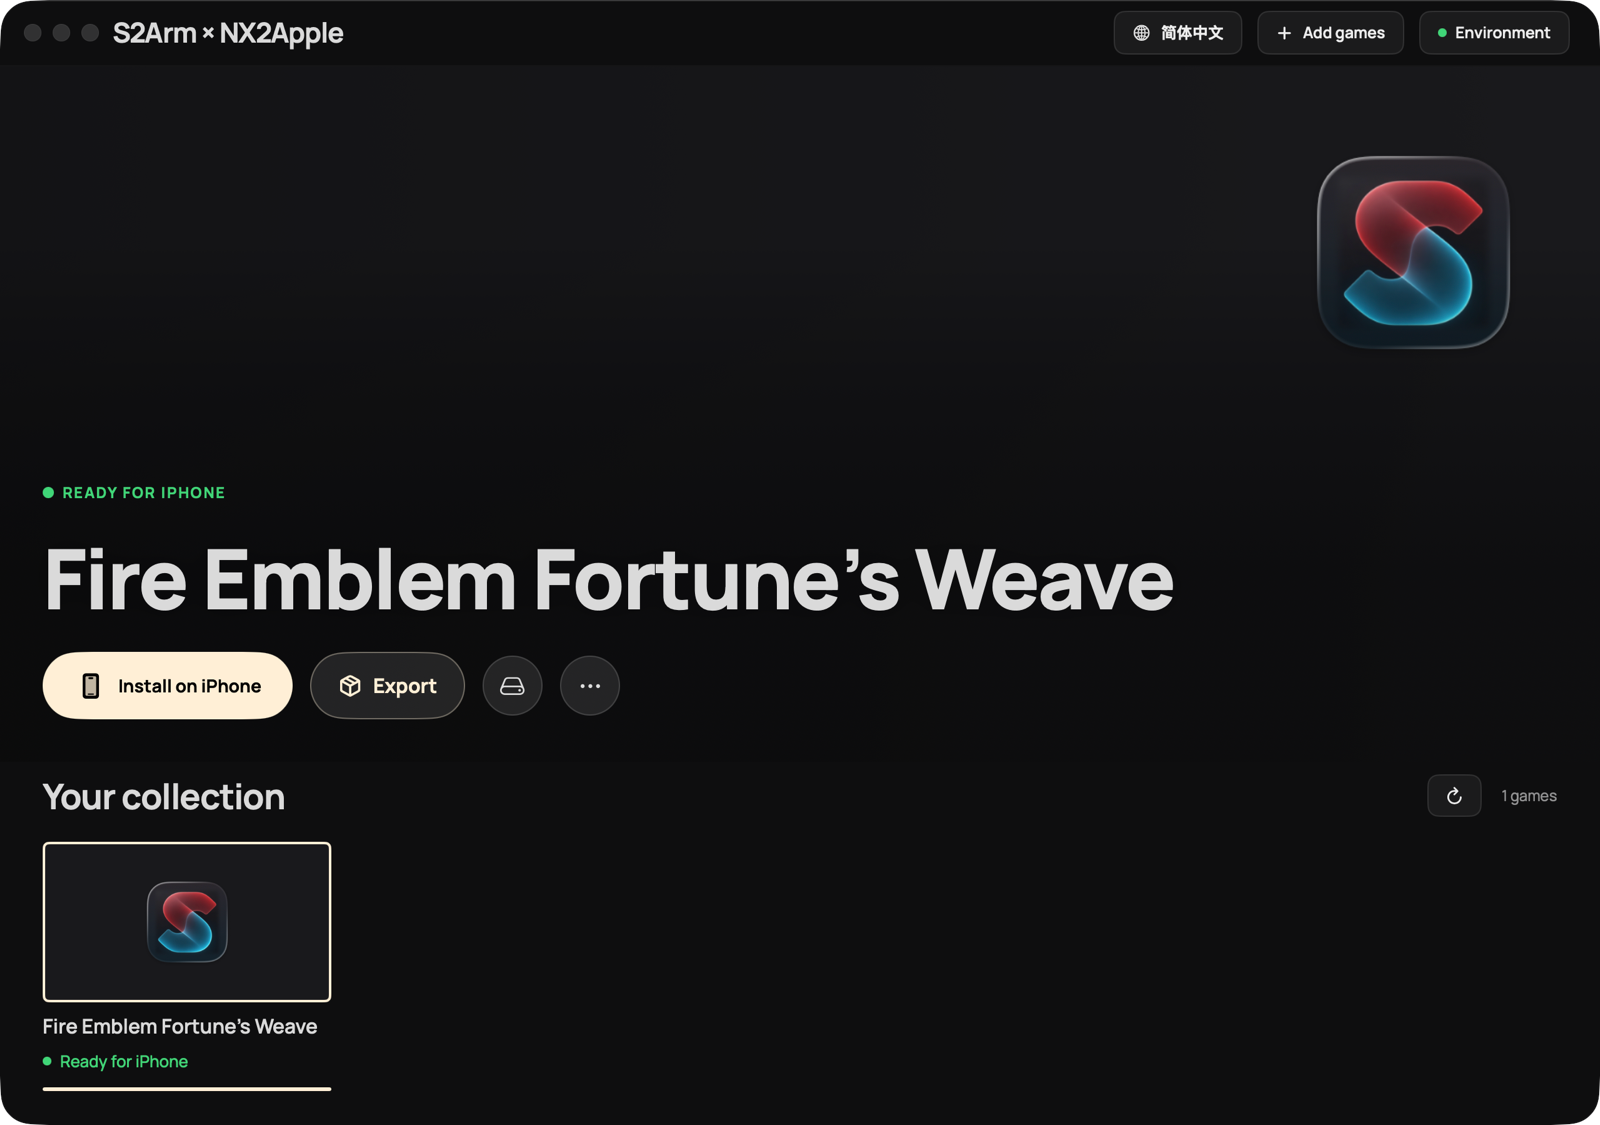 Open full-size image ↗
.s2asave archive outside the game library. Name it with the game version and date.before-restore.s2asave copy of previous progress.The selected game’s save-folder action opens its SaveData/ handoff folder. Use the launcher’s backup/inspection flow for full-state recovery; copying a random cache folder is not a save backup. Supported community structures include JKSV, Checkpoint, yuzu and Ryujinx folders or ZIPs, subject to the preview checks.
Save-management interface ↗ · Stopped-game backup, inspection and restore ↗
This recovery is for the older-save import problem fixed in 0.3.2. It mainly affected iPhone users upgrading from 0.2.4–0.2.9. Close the game and copy its current data somewhere safe before replacing anything.
Open Files → On My iPhone → S2Arm → padrec. Each name_date_time.saveN folder holds a complete backup from an in-game save. Use its date and matching screenshot to choose the last correct progress from before the upgrade.
Open the chosen folder and copy its account folder and user file. Keep the original dated backup intact. Do not choose an older slot just because its folder appears first.
Go to S2Arm → games → this game's title ID → SaveData. Move the existing save folder somewhere else. Put the copied account folder and user file here, then rename account to save.
Use the updated S2Arm app, open this game and load the progress shown in the backup's screenshot. Keep the previous save and dated backup until you have confirmed the correct location and progress.
account/ from the backup → rename to save/user from the same backup → keep as userMove the previous save aside first. Keep both backup items together.For normal backups and restoration, use the Mac launcher's save-management flow. If you are using the other launcher, follow NX2Apple's own update and save locations instead.
| Change | Before you change it | Afterwards |
|---|---|---|
| Launcher release | Finish active jobs and keep an external save backup. | Open the existing library with the new launcher and check its entries. |
| Game version or built runtime | Record the working title/version and back up that game. | Build the intended version, install its app/resources and load the expected save. |
| Xcode account ↔ developer certificate | Export saves from the existing mobile app and record its signing route. | Changing identity installs a separate app. Restore the matching backup there before removing the old installation. |
| Beta → io.s2arm.* release | Export saves while the beta app is still available. | The OS treats the new identifier as another app. Complete installation, then migrate the matching saves; keep the old app until progress loads. |
Do not delete a working mobile app to renew its signature. Keep the same app identity and signing account for an in-place replacement. The release’s io.s2arm.* identifier change is a migration, so beta saves do not carry over automatically. Keep the old installation and backup until the new app opens the correct progress.
When reporting a problem, include the launcher release, build computer/OS, destination device/OS, game/update version, failed stage and first error. Keep game packages, keys and account credentials out of public reports.
13 November 2026 · Release v0.3.4 · Source b923ac5 · Published interface examples accompany the relevant steps.
The welcome, Xcode-check and signing controls were captured from the official English 0.3.4 Mac app on 13 November 2026. The library, build-progress and completion images are published project examples, unchanged in the tagged 0.3.4 documentation. Their game, duration and resource sizes belong to those examples. The folder map explains the release’s documented save recovery. Project code is Apache-2.0; game names and assets belong to their owners.

