Windows · installed
LongshotLauncher-v1.0.0-windows-x64-setup.exeChoose Install on first start. The launcher installs for your Windows user.
LONGSHOT / WINDOWS & LINUX
Use the stable Longshot Launcher on Windows or Linux to build your supported Switch 2 copy of Ocarina of Time. Import Hookshot progress after making a backup.
On an Apple silicon Mac, choose Ship of Harkinian for a supported N64 ROM or Ocarina ReTuned for a supported decrypted 3DS copy.
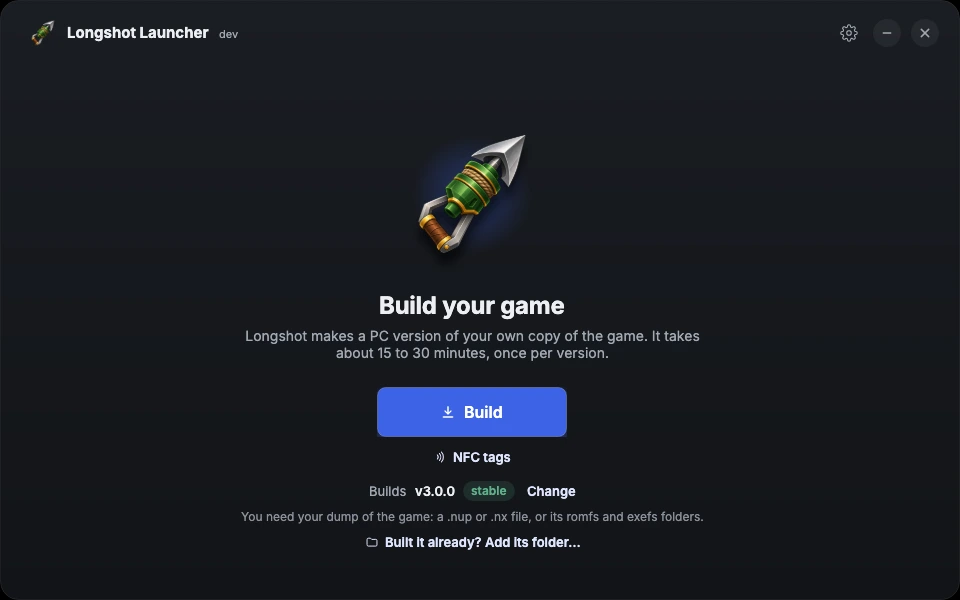
Guide checked 19 November 2026 · Launcher v1.0.0 · Game/Builder v3.0.0. On a Mac? Choose a Mac route ↓
The official repository is MagicBeanDev/Longshot on Forgejo, linked from longshot.magicbean.dev. Its launcher has a separate repository. Use those sources when looking for “Longshot GitHub”; an old GitHub fork can have no current player downloads.
v1.0.0Choose files, build, update and manage saves.
v3.0.0Checks and builds the supported game on your PC.
Press Play after the build and shader preparation finish.
Download the Launcher for normal setup. The core repository's Builder ZIP and AppImage are build tools used by the launcher, with advanced command-line uses. They are separate from the player-facing Launcher packages below.
LongshotLauncher-v1.0.0-windows-x64-setup.exeChoose Install on first start. The launcher installs for your Windows user.
LongshotLauncher-v1.0.0-windows-x64-portable.zipExtract the whole ZIP, then open LongshotLauncher.exe. Keep its portable marker and data folder together.
LongshotLauncher-v1.0.0-x86_64.AppImageMake the AppImage executable, then open it. Build and play from the launcher.
The buttons follow the official Stable channel. To get the exact packages listed here, open the Launcher v1.0.0 release. A fresh setup defaults to Stable and builds Longshot v3.0.0.
0400486024DEC000v131072e0f3ccfaSupply your own .nup, or the extracted romfs and exefs folders for that supported game. An N64 ROM, a 3DS ROM or another update needs a different route. The launcher checks the input; changing the filename does not change its version.
Use the launcher's requirements panel to check the selected PC and GPU. These are upstream estimates, rather than a frame-rate target. See the system requirements and GPU notes if the panel reports a missing capability.
Open the setup executable and choose Install, or extract the portable ZIP and run LongshotLauncher.exe. Installed and portable copies keep their data in different places; keep using the same copy for your library.
In the file manager, allow the AppImage to run as a program, then open it. From its download directory, you can set that permission with:
chmod +x LongshotLauncher-*-x86_64.AppImageA fresh setup shows Stable and Game/Builder v3.0.0. If an older launcher saved a different choice, use Change to pick Stable before building. See Track and Version if you already have a build.
In Game files, choose a detected file or use Browse…. For an extracted dump, choose romfs and exefs folders. Wait for both the input check and the builder-tools download; Next becomes available when the required inputs are ready.
In Settings, check the drive's free space and choose your game language. The default games parent is Games\Longshot under your Windows user folder or ~/Games/Longshot on Linux. Optional DLSS, FSR 4 or XeSS choices depend on the build and hardware. Windows with Intel graphics also has Intel shader compiles; Auto is the default for a fresh setup. Existing saved choices carry over.
Press Build v3.0.0 and keep the window open through file processing, compilation and shader preparation. Time varies by PC, drive and driver. A failed stage needs its error or log checked; elapsed time alone does not tell you whether the build has stopped. Use the new reporting controls only after reviewing what they send.
When the ready screen appears, press Play. You can add shortcuts from that screen. If you brought a save, load the expected slot before continuing; for new progress, save and quit before making your first backup.
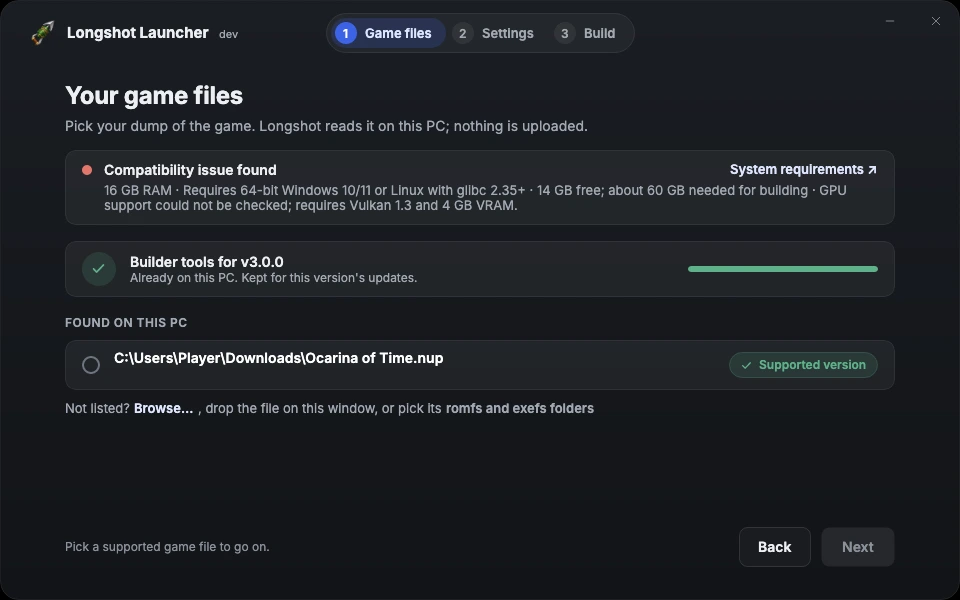
Select the detected file or use Browse.
Use both extracted folders for a folder input.
Pick the detected file, use Browse, or choose the two extracted folders. Next waits for file selection and the builder tools. The source-rendered example uses a sample file and compatibility check.
Image source ↗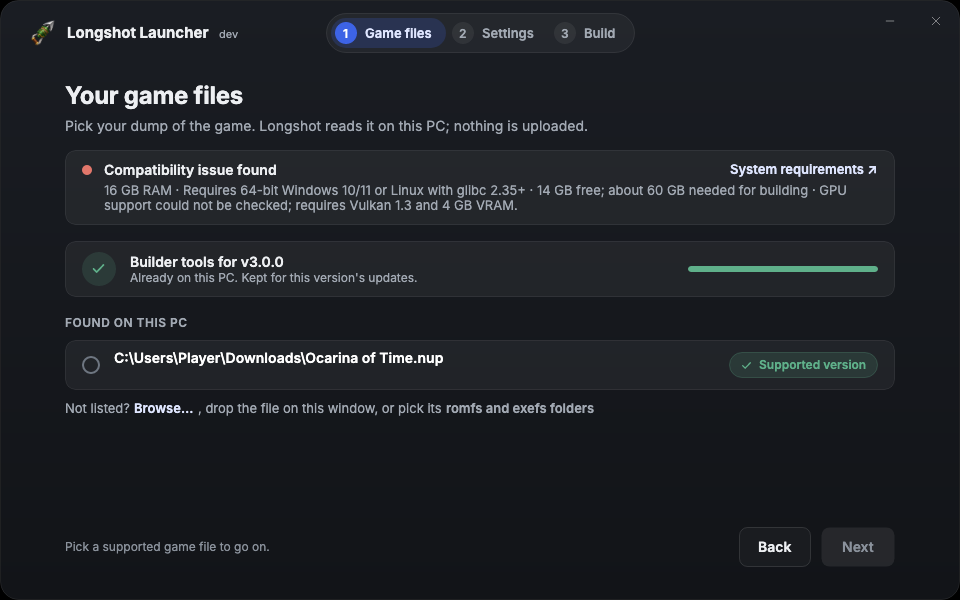 Open full-size image ↗
Open the home screen's cog, then choose the launcher's language in Settings. That changes the launcher interface. The game's language is a separate choice in each build's settings.
The wizard's Build settings apply to that game build. The home-screen cog opens the launcher's Settings, including its language, update channels and reporting choices.
In Build settings → Intel graphics → Intel shader compiles, Auto leaves the decision to the game and lets you change its own menu row. For a fresh setup, Auto is the default; an older saved preference can remain selected after an update.
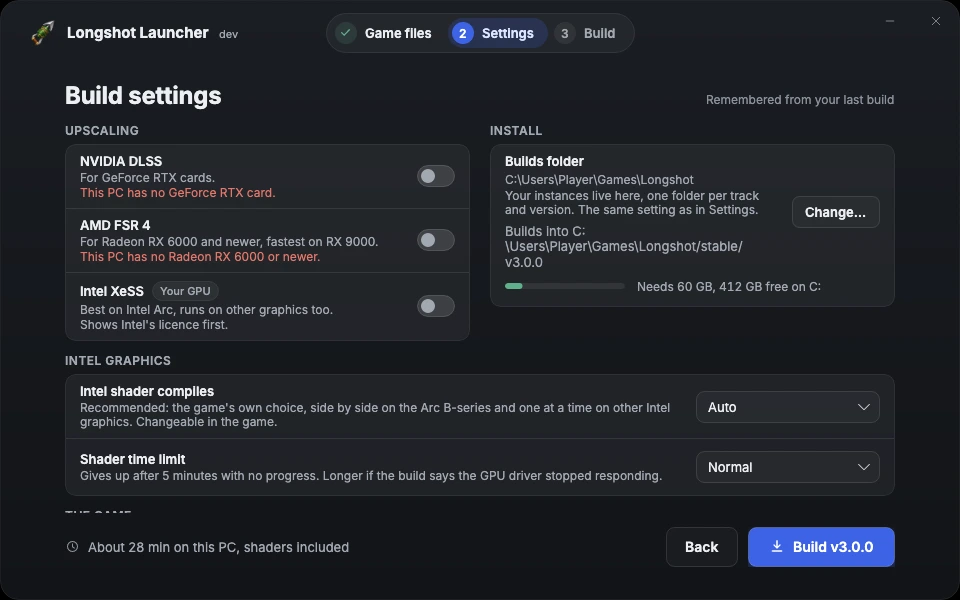
Choose Auto to follow the game’s decision.
Keep the time limit on Normal for a first build.
Launcher v1.0.0 Build settings with an example Intel GPU. Auto and Normal are selected.
Image source ↗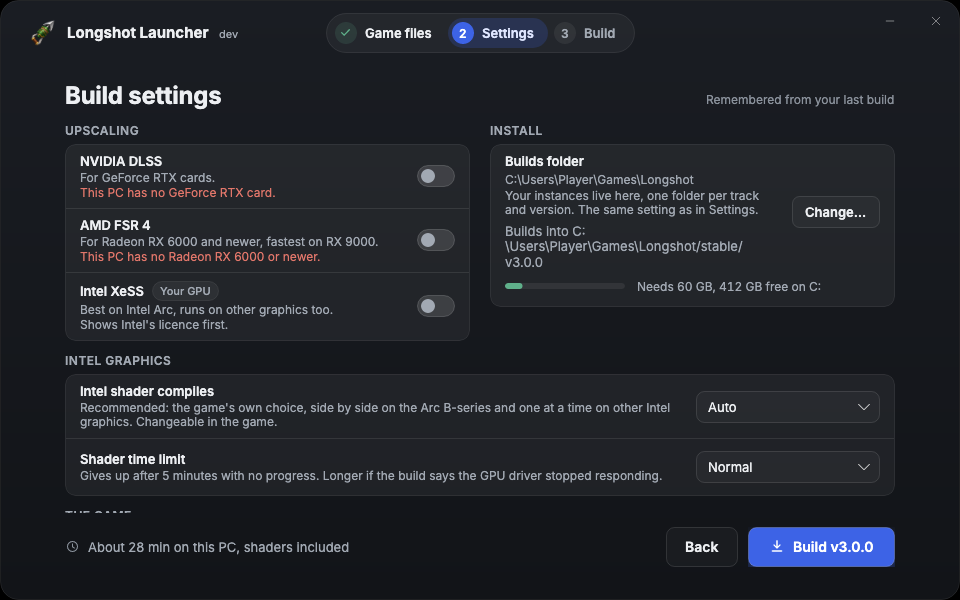 Open full-size image ↗
The old Side by side choice stays Side by side. The old One at a time choice maps to Auto: that older choice left the decision to the game. Choose the new One at a time explicitly to force serial compilation.
For the specific slow-driver wait, Shader time limit → Longer extends the preparation wait to 30 minutes instead of 5, and the final pipeline wait to 3 minutes instead of 30 seconds. It does not fix an unsupported GPU or a different crash. Return it to Normal to undo that change.
Open the home-screen cog, then scroll down in Settings. Performance statistics and automatic crash reporting are separate choices; both start off. You can leave them off and still build and play.
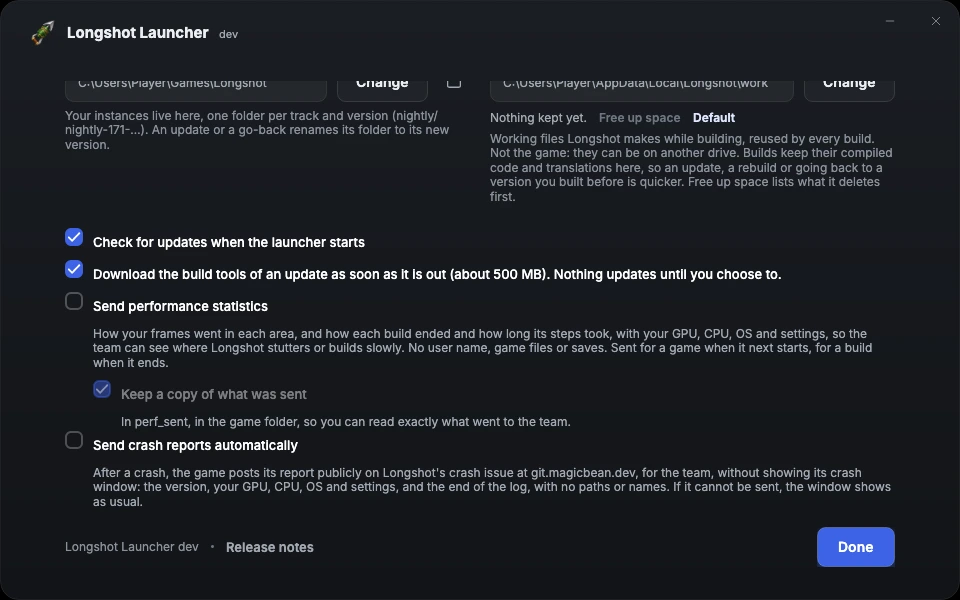
Performance statistics starts off.
Automatic crash reporting has its own switch.
Launcher v1.0.0 Settings with an example profile. Keep a copy of what was sent is available when performance statistics is enabled.
Image source ↗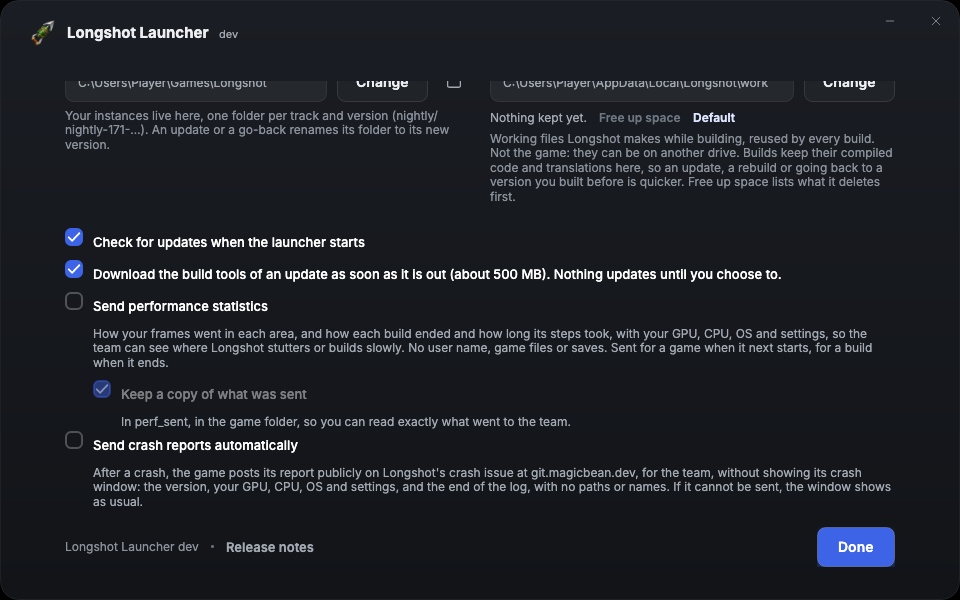 Open full-size image ↗
Opt in to send frame and system summaries, plus how builds ended and how long their stages took. Keep a copy of what was sent keeps sent game-performance summaries in perf_sent in the game folder.
Untick statistics to stop it. The game-performance guide says this also clears its pending summaries and retained copies.
Opt in separately to let the game post its crash report publicly on Longshot's crash issue, including system details and the log's end. With it off, the game asks in its crash window. Untick it to return to that prompt.
~; it excludes game files and saves.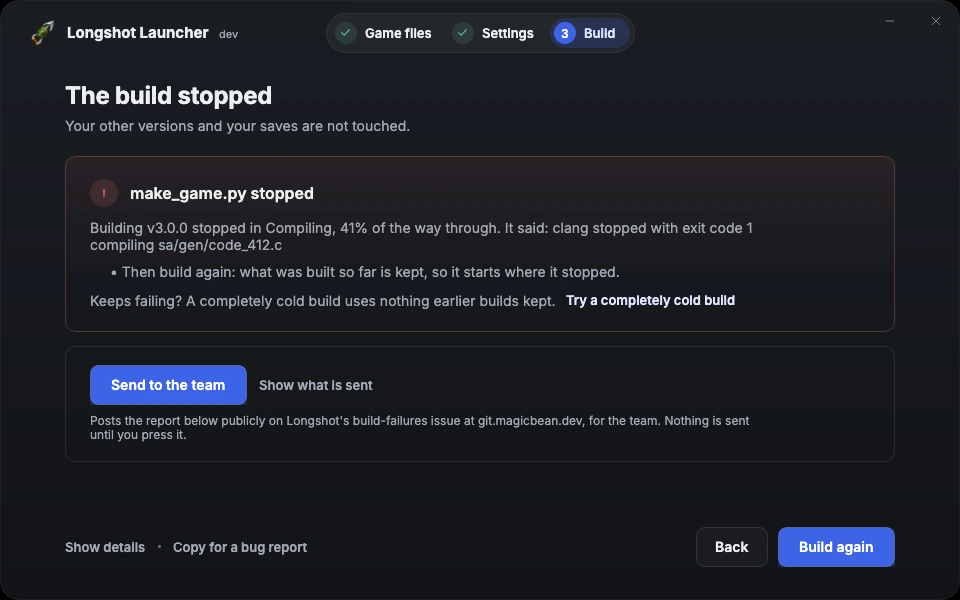
Open Show what is sent before posting a report.
Launcher v1.0.0 failure page with a sample compiler error. Use Show what is sent to review the report.
Image source ↗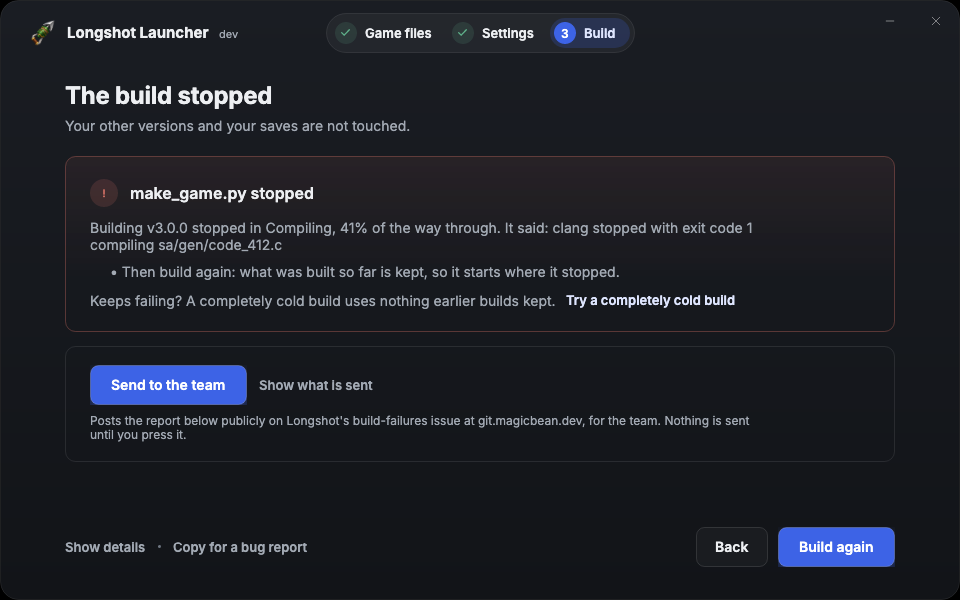 Open full-size image ↗
On home, use Track and Version for the game build you want to play, update or rebuild. In the home-screen cog, Channel for new builds sets the starting choice for new builds. Launcher updates sets the launcher’s own update channel.
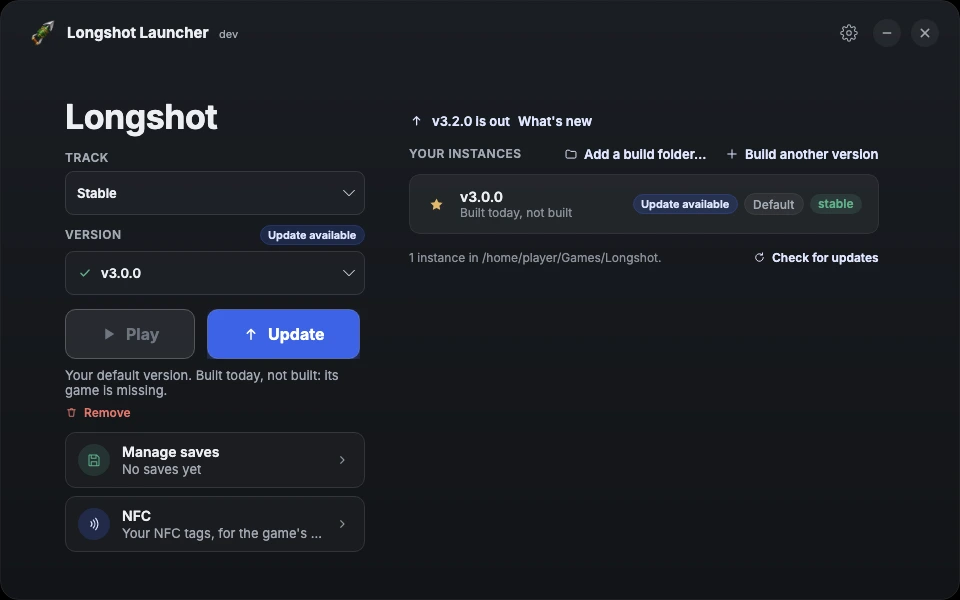
Choose the Track, then the Version.
Use Update when the launcher offers it.
Update appears next to Play when a newer build is available on the selected track. The illustrated version labels are sample data.
Image source ↗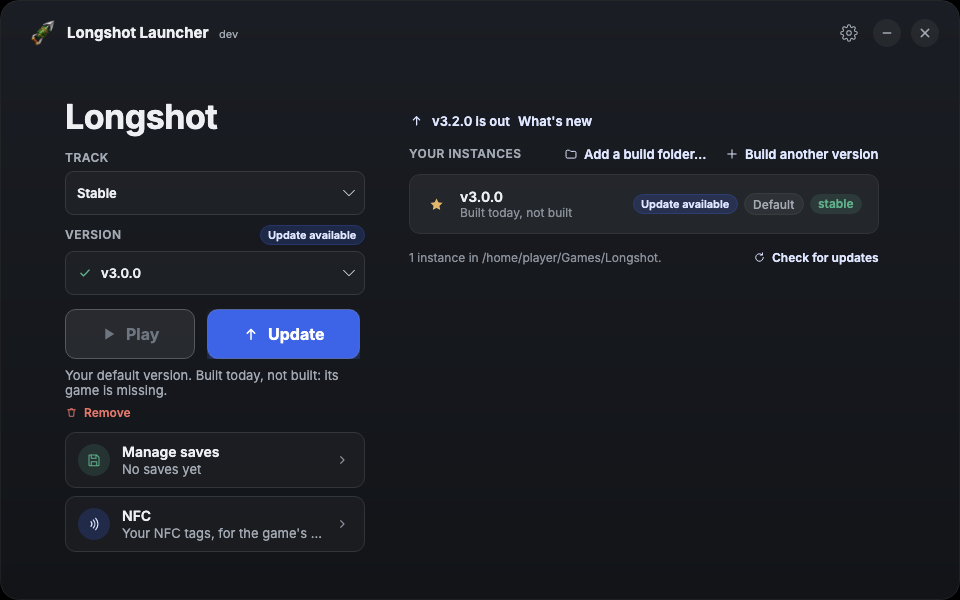 Open full-size image ↗
Use the launcher update offered on home. It downloads and verifies its own application separately from the game, then replaces itself.
Installed Windows copies stay installed; portable copies update beside their portable marker. Keep the portable data folder in place.
Coming from an RC? Update the launcher first. On home, choose Stable and the offered stable version. If that track has no build yet, choose Build. Your existing RC build keeps its own track.
The launcher updates or rebuilds the selected instance. Its folder can be renamed to match the new version under the track. Use Open folder on the instance row to find it. Compatible shader caches are reused. Changed tools or graphics drivers can require preparation again.
The available history depends on what the server still offers. Version-selection rules ↗
Close the launcher before restoring it. Its documented --rollback option puts back the previous launcher, when one is retained. For an installed Windows copy, run:
& "$env:LOCALAPPDATA\Programs\LongshotLauncher\LongshotLauncher.exe" --rollbackFor a portable copy, run the actual executable in that portable folder with the same option. If an interrupted Windows swap left the executable missing, the upstream recovery is to rename the adjacent LongshotLauncher.exe.old back to LongshotLauncher.exe. Leave game folders and saves in place.
Close Longshot, Hookshot and any emulator before copying saves. Open Manage saves under the default version on home. You can import before the first game launch; an existing destination is backed up before it is replaced.
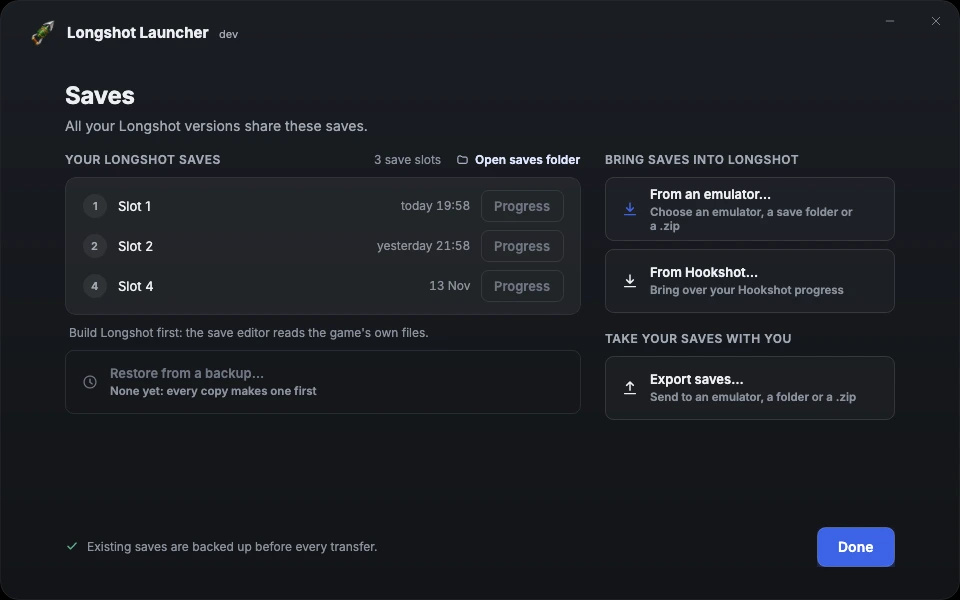
Choose From Hookshot to bring your Hookshot progress.
Return to Saves to restore a backup.
Launcher v1.0.0, shown with example slots. From Hookshot opens the dedicated importer. From an emulator also accepts a folder or supported ZIP.
Image source ↗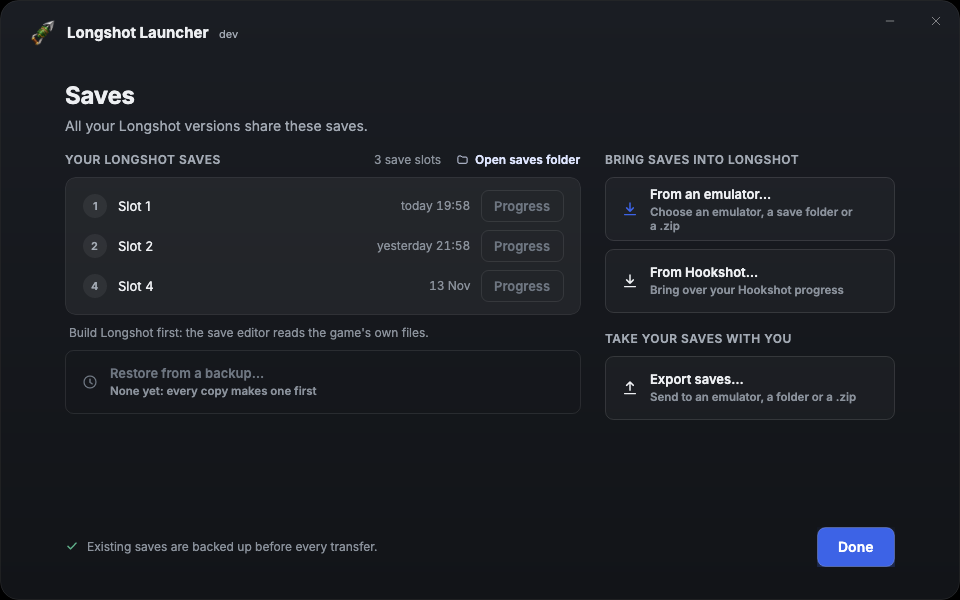 Open full-size image ↗
Hookshot keeps its original files. To cancel a replacement, choose Keep Longshot's save.
The picker detects several emulators and NX2navi. For a Fritchii export, extract its archive and select the save folder; Longshot expects save files, not the ZIP itself.
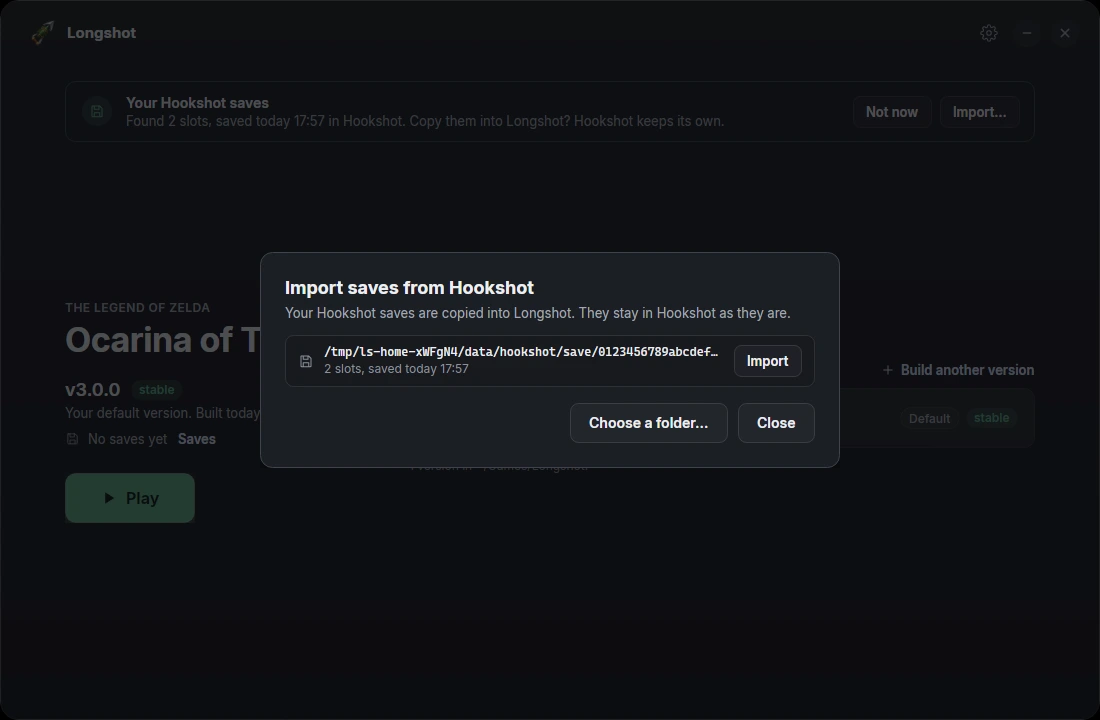
Read the source row, or choose the folder yourself.
The source row identifies the folder and slots. A custom folder can be selected below it. This earlier upstream Linux example shows the source choice. The current importer has a separate Import graphics and controls action.
Image source ↗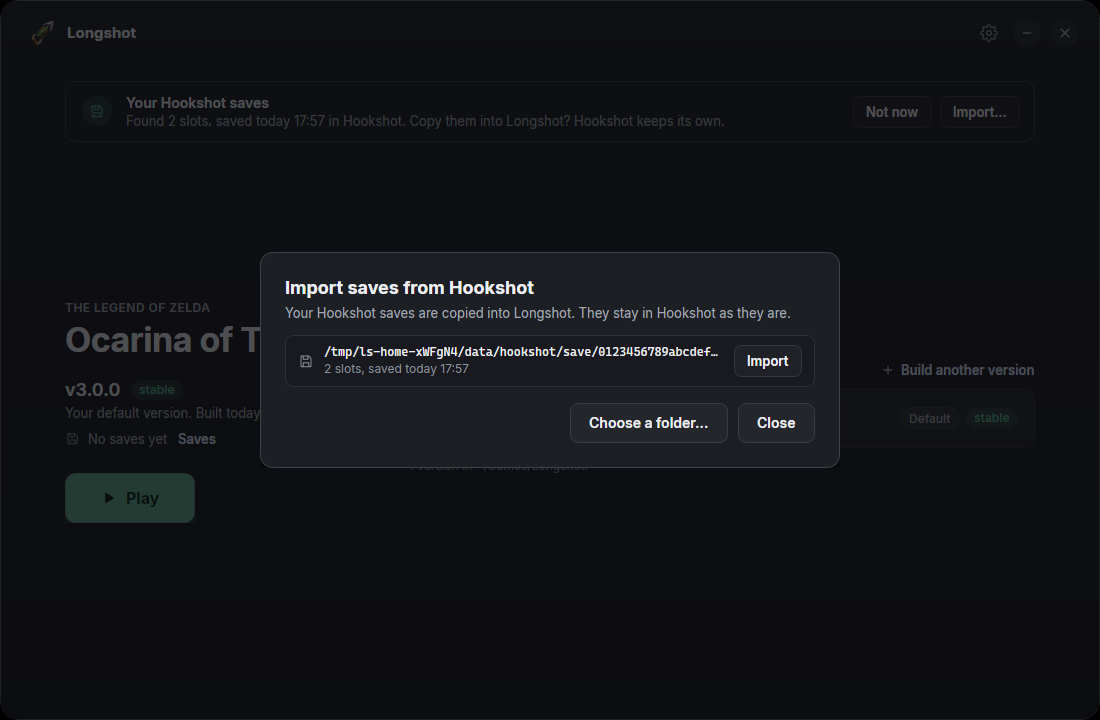 Open full-size image ↗
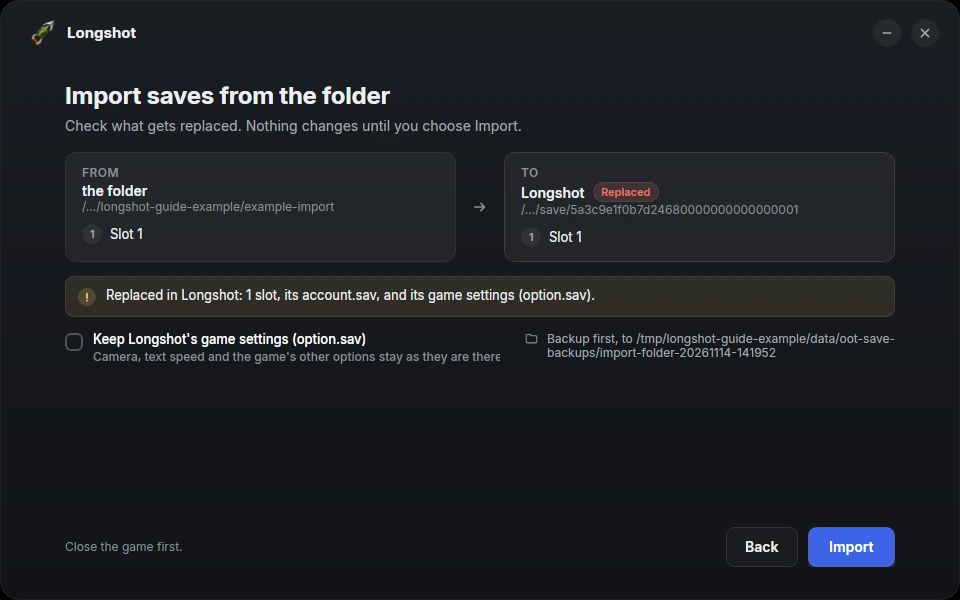
The destination is replaced with the source; slots are not merged.
Check FROM and TO before Import. Keep Longshot’s game settings preserves option.sav. This nightly-52 UI example shows an older backup path; use the stable launcher paths below and the location your operation displays.
Image source ↗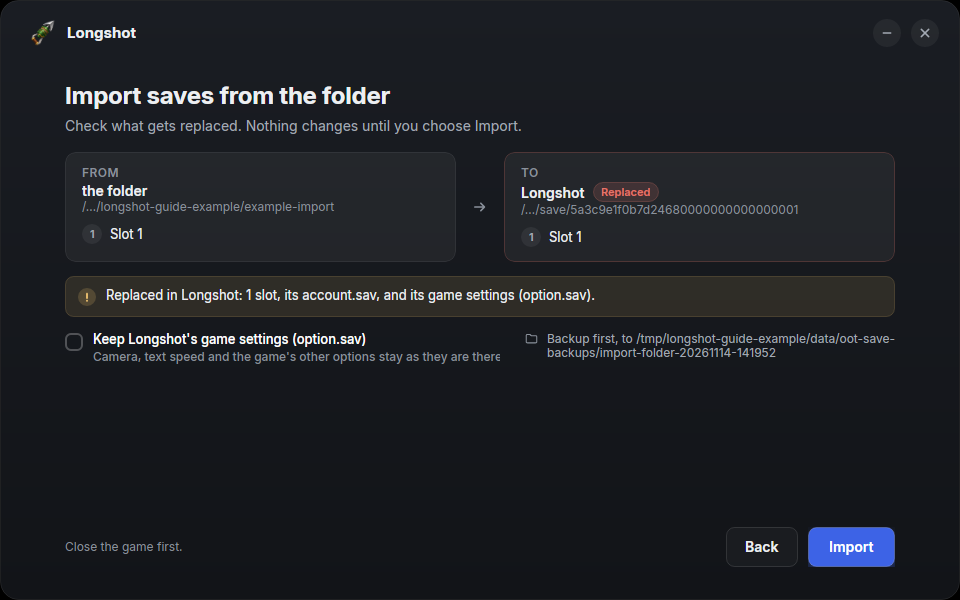 Open full-size image ↗
In the Hookshot importer, choose Import graphics and controls…. Choose Hookshot's game folder and an installed Longshot version, review the listed settings and destination, then confirm. If no Longshot build exists yet, import saves first and return for settings after building.
Compatible hookshot_options.ini settings and recognized language.txt content are handled separately from the save copy. Unsupported keys are skipped; launcher preferences, shader caches and unrelated files stay outside this import.
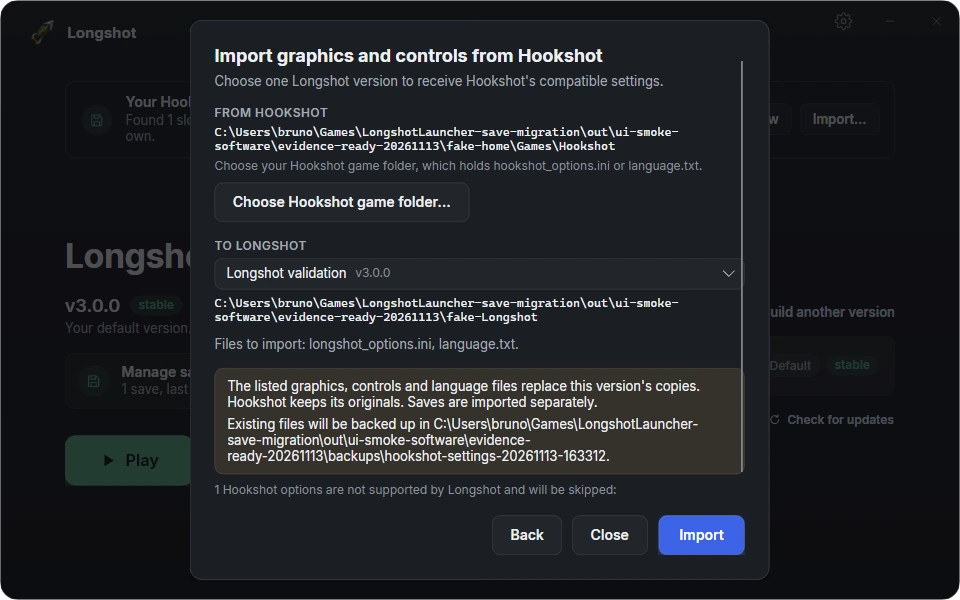
Choose the target build and read the replacement summary.
This upstream Windows sample shows the chosen game version and backup. Existing destination settings are backed up before the listed values replace them.
Image source ↗ Open full-size image ↗
Start NX2navi once, let its pending save or menu import finish, then quit it before retrying. Longshot refuses a transfer while a completed save is waiting in NX2navi's profile/save-tx or profile/save-import. Do not delete those folders to force the import.
Start the destination emulator and save once to create its folders, then close it. In Longshot's Saves page choose Export saves…, pick the emulator/profile or Another folder…, and review the source, destination and backup before Export. The destination is backed up first; this launcher does not export directly to Hookshot.
Choose Open saves folder on the Saves page to find the active save. The Launcher v1.0.0 defaults are below. Each active save sits in a player-ID folder under save. Keep the save files private and use the exact destination and backup paths displayed by your transfer when storage has been customized.
%APPDATA%\Longshot\save\<player id>\Backups%LOCALAPPDATA%\Longshot\oot-save-backups\LongshotLauncher-data\user\save\<player id>\Backups, beside the launcherLongshotLauncher-data\save-backups\~/.local/share/longshot/save/<player id>/Backups~/.local/share/longshot/save-backup/<game folder>\user\save\<player id>\Launcher v1.0.0 links an eligible NTFS build’s user\save to the shared save. An older unlinked build or a drive without junction support can still use its own folder. Check the active folder before backing up.
Press Windows–R and paste:
%APPDATA%\Longshot\saveFor a portable launcher, open its adjacent LongshotLauncher-data folder instead. The launcher's own installed data, %LOCALAPPDATA%\LongshotLauncher, is separate from the active game saves.
If XDG_DATA_HOME is set, replace ~/.local/share with that directory. Linux AppImage portable mode uses an adjacent <AppImage filename>.home folder, which also changes the home seen by programs it starts. Follow the displayed paths instead of copying into the normal home by assumption.
The launcher backs up older per-build saves before gathering them. It keeps existing shared slots and brings in older slots without overwriting them. Progress that cannot fit stays in a backup. Read the home notice before touching an old build or its save.moved-<timestamp> folder.
Progress from the two adventures is not combined. This example describes the documented copy rule.
Quit the game and open Manage saves → Restore from a backup…. Match the reason, time and slots, then choose Restore… and read the confirmation. The launcher makes a backup of the progress it replaces. To recover other profiles from a whole-folder ZIP backup, open the backup folder and follow the manual steps below.
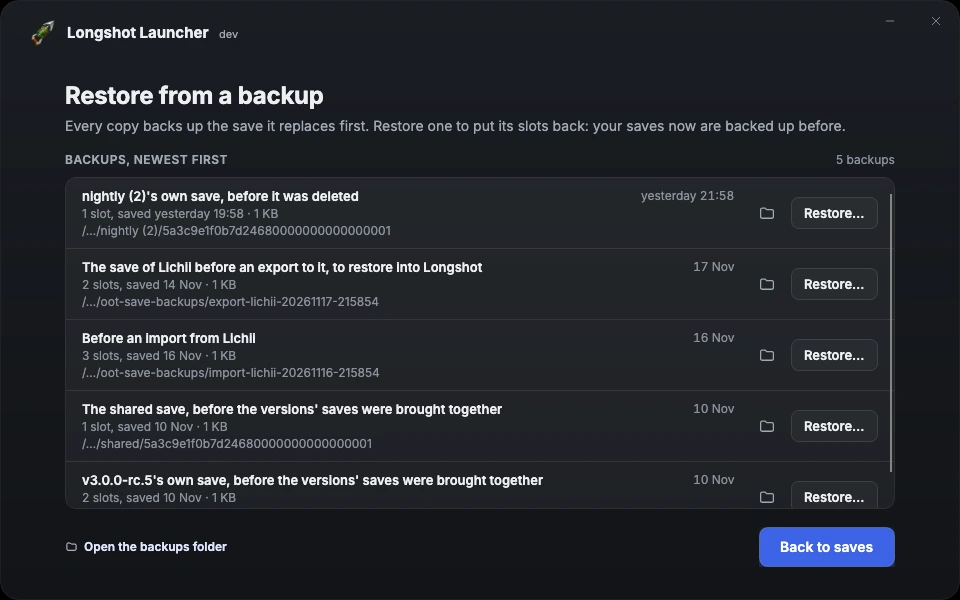
Match the backup reason before choosing Restore.
Launcher v1.0.0 with example backups. Each row shows what made it, when and which slots it contains.
Image source ↗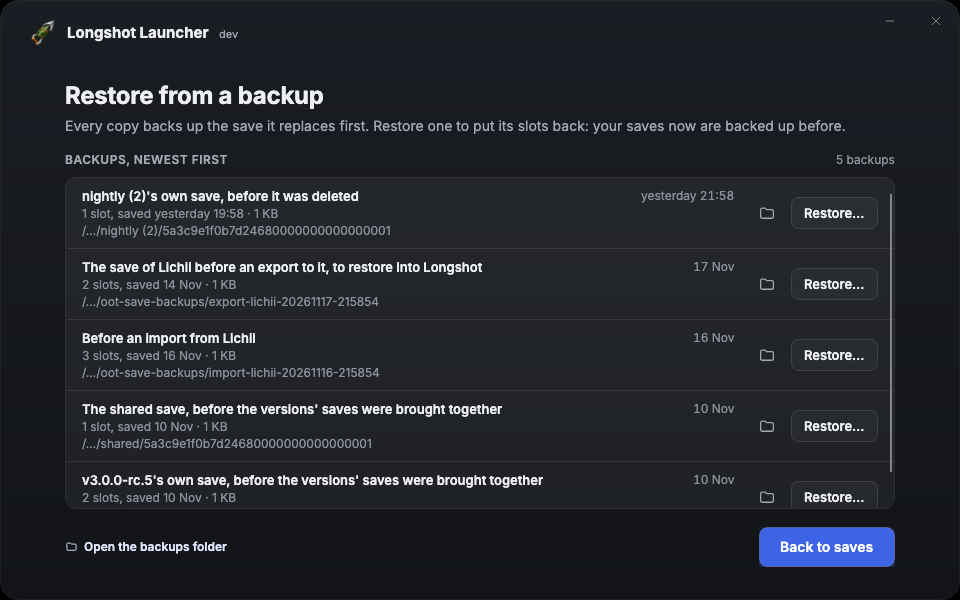 Open full-size image ↗
Quit Longshot, Hookshot and any emulator. Find the backup path from the completed operation, or the matching timestamp folder under your backup parent.
Copy the current complete destination player folder somewhere outside the active save tree. Confirm which player folder the earlier import replaced; restoring to a different player ID can leave the game showing no progress.
Open the selected backup until you see account.sav, option.sav and its slot_NN folders. Move the current destination contents aside, then put the complete backed-up set into that same player folder. Avoid merging selected slot files from different backups.
Load the expected name and progress before playing further. If it is wrong, close the game and recheck the source, timestamp and destination; preserve both your safety copy and the original backup.
Compare the exact program, update and build against the supported input. Wait for the builder-tools download as well as validation. If using extracted files, select both the correct romfs and exefs folders; a different game's data or an incomplete dump needs the original files corrected.
Keep the error message and use the launcher's Copy for a bug report action when offered. Check network access to the official host and retry after correcting the connection. A signature or checksum failure calls for a fresh official download, rather than bypassing verification.
Check the actual game destination and build-files drive. Free space in the relevant location and preserve the error stage before retrying. For a GPU-driver failure, keep its exact message and driver version; the upstream GPU-specific notes distinguish rendering issues from input and disk problems.
Use the custom-folder choice for a portable or moved installation. The folder must contain the supported game's save files: account.sav, option.sav and complete slot_NN folders, including progress.sav. Close running programs, extract archives first and read the validation message before copying again.
LongshotLauncher.exe, its portable marker and LongshotLauncher-data together.An external game folder is a separate location. If the row is still missing, preserve the folders and check where the game executable actually is; deleting a row is not a recovery step. Portable relocation rules ↗
Update the launcher to v1.0.0 or later, then reopen it. It can find a newer, working update left unlisted in the builds folder, return it to the appropriate row and keep it out of the old-version deletion offer. This fixes a specific older-update case; keep your working folder and save backup until the correct version appears and plays. The missing-update fix ↗
Use the complete official stable package first. The launcher includes a fallback font and more specific DirectWrite diagnostics. Keep the full message if it still fails, including any dwrite.dll from System32, Restrictions or Other modules lines. Do not replace Windows DLLs with downloads from another site; share the diagnostic through the project's support route. What the font diagnostic checks ↗
Read the folder named by the error. A Windows compatibility junction such as C:\Users\<name>\Cookies can refuse directory listing before the compiler starts. For a portable launcher, close it and move its complete launcher/data set to a normal folder you can list. Keep the existing game folder and save backup.
For an installed copy, use its normal per-user location. If a custom build-files location sits under the blocked parent, choose a normal writable folder in launcher Settings → Build files → Change, then retry the check. The launcher names this problem instead of treating it as a generic antivirus failure. Folder-permission fix ↗
The Steam Deck guide for v3.0.0 also covers storage, first-launch preparation and optional tuning.
Use this branch when the kernel log contains that exact GPU timeout. In Desktop mode, inspect it with:
journalctl -klongshot_env.txt in the game folder.NAME=value line to that file, keeping its other settings. It is a configuration line, not a Terminal command.RX_VK_MESH_NOCULL=2c56dc1006942f74Restart and check the same location. The upstream workaround skips the affected culling pass while keeping models drawn. To undo it, close the game and remove only that line, or restore the earlier file. If the log names a different error, keep it and use the matching upstream symptom.
The stable Launcher provides Windows x64 and Linux x86-64 packages. The macOS port remains a paused draft. Choose the Mac route that matches your edition of Ocarina of Time. Each route has its own save format.
| You want to… | Choose | What changes |
|---|---|---|
| Use Longshot on Windows or Linux | LongshotLauncher | Your supported Switch 2 game, local build, shared saves and Hookshot import. |
| Use another PC recompilation workflow | NX2navi | Its own installer/build kit, version requirements, launcher and Mods tools. |
| Use a Windows emulator library | Fritchii | Game/system files and an emulator setup; its own data migration and Saves manager. |
| Set up a Mac emulator with Eden data | Lichii | A separate emulator app, your game/system files and its Keep Old Data import workflow. Follow its own installation and profile paths. |
| Play N64 Ocarina on a Mac | Ship of Harkinian | A supported N64 ROM and the SoH Mac app. |
| Play Ocarina of Time 3D on a Mac | Ocarina ReTuned | A supported decrypted 3DS ROM and first-run preparation in the Mac app. |
For Switch 2 emulation on Mac, follow the separate Eglantine setup and compatibility guide. Browse all project routes →
The English welcome, build, update and save views are rendered from Launcher v1.0.0 with sample files, slots and version labels. The earlier Hookshot and import confirmation examples keep their original captions. Use the paths and version shown by your own launcher.
Original source links accompany the figures. Longshot and its launcher are distributed under GPL-3.0-or-later.


